Joconde Imprime with Chocolate Mousse & White Chocolate Strawberry Mousse Entremet
As an Amazon Associate, I earn from qualifying purchases. Read the full disclosure here.
The January 2011 Daring Bakers’ challenge was hosted by Astheroshe of the blog accro. She chose to challenge everyone to make a Biscuit Joconde Imprime to wrap around an Entremets dessert. After reading the description and seeing the finished products I was speechless. This dessert is absolutely gorgeous but looked incredibly difficult. I stalled for several weeks before I finally decided to give it a try.
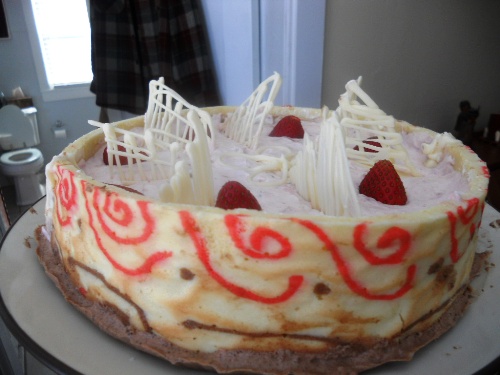
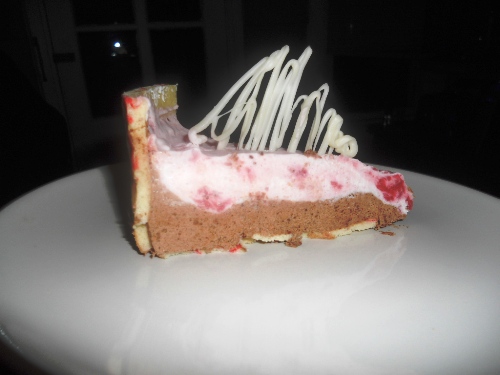
The only problem I had was that I had to use two pieces to wrap around the mold. This created a bit of a problem and next time I’d like to make it all one piece. The chocolate mousse also didn’t harden as much as I would have liked but the white chocolate strawberry mousse was perfect. After I put it together I put it in the freezer for about 20 minutes which really helped the dessert to stay together.
5 T. unsalted butter, softened
½ c. powdered sugar
3 large egg whites
2/3 c. cake flour
Food coloring gel
1 .Cream butter and sugar until light and fluffy (use stand mixer).
2. Gradually add egg whites. Beat continuously.
3. Fold in sifted flour.
4. Tint batter with coloring to desired color.
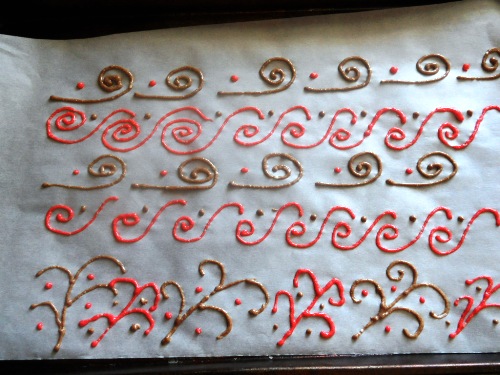 5. Put a silpat mat or piece of parchment paper onto a large baking sheet.
7. Slide the baking sheet into the freezer and freeze hard for 30 minutes.
Joconde Sponge (recipe adapted from Chef John O. at The International Culinary School in Atlanta, Georgia USA)
1 c. flour
½ cup powdered sugar
3 large eggs
2 large egg whites
2½ teaspoons white granulated sugar
2 tablespoons unsalted butter, melted
1. In a clean mixing bowl whip the egg whites and white granulated sugar to firm, glossy peeks. Reserve in a separate clean bowl to use later.
2. Sift the flour and powdered sugar in the mixing bowl.
3. On medium speed, add the eggs a little at a time. Mix well after each addition. Mix until smooth and light.
4. Fold in one third reserved whipped egg whites to almond mixture to lighten the batter. Fold in remaining whipped egg whites. Do not over mix.
5. Fold in melted butter.
Baking the Janconde Sponge:
1. Preheat the oven to 475 degrees.
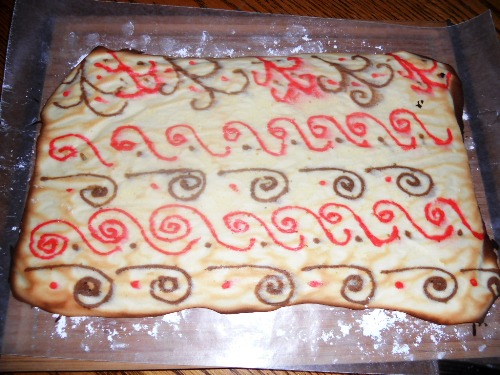
2. Remove the piped paste from the freezer. Quickly pour the Joconde batter over the design. Spread evenly to completely cover the pattern of the Décor paste.
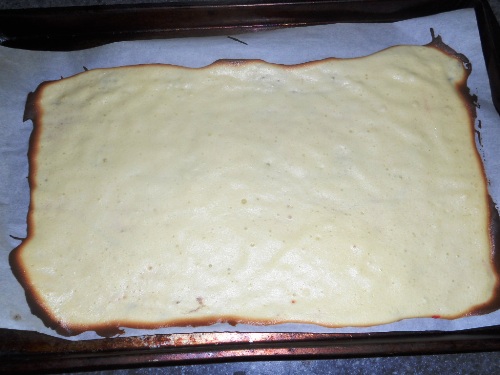 3. Bake for 7-8 minutes or until the edges are brown and the sponge bounces back when pushed on.
 5. Flip cooled cake on to a powdered sugared parchment paper. Remove silpat. Cake should be right side up, and pattern showing! (The powdered sugar helps the cake from sticking when cutting.)
3. Wrap parchment paper around the inside of the mold and place plastic wrap on the bottom of the mold before beginning. I used a springform pan without the bottom.
4 .Once your height is measured, then you can cut the cake into equal strips, of height and length. (Use a very sharp paring knife and ruler.)
 5. Make sure your strips are cut cleanly and ends are cut perfectly straight. Press the cake strips inside of the mold, decorative side facing out. Once wrapped inside the mold, overlap your ends slightly. You want your Joconde to fit very tightly pressed up to the sides of the mold. Then gently push and press the ends to meet together to make a seamless cake. The cake is very flexible so you can push it into place. You can use more than one piece to “wrap “your mold, if one cut piece is not long enough.
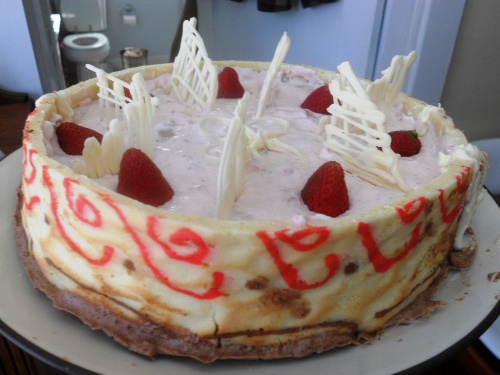
You are amazing! That cake looks spectacular and I love your white chocolate additions on the top. I bet this was delicious. Thanks for linking this up to Sweets for a Saturday. Hope you’ll be able to join in again next week.
It looks so beautiful and delicious!
BEAUTIFUL job on the Joconde! Love your design, and it looks DELICIOUS!
Your flavor combination sounds amazing, especially the strawberry mousse! Nice work on the decor paste and joconde, it turned out so pretty!