DIY Snowglobe Photo Ornaments

As an Amazon Associate, I earn from qualifying purchases. Read the full disclosure here.
Adorable DIY Snowglobe Photo Ornaments take your favorite winter pictures and turn them into hanging ornaments perfect for gift giving!
I am one of those people that starts trying to come up with holiday gifts in the middle of summer. Since I had extra time this year I was searching Pinterest early on to find some easy to make but cute crafts that would be great for gift giving.
The moment I saw these ornaments I knew I had to try them. They looked like kids inside of snowglobes that were then turned into ornaments. When I looked at the instructions I knew they would be easy to make.
I looked through my recent photos and found ones of J in his winter coat that would be appropriate for him sitting in a snowglobe. I ordered those and then made sure I had the other supplies.
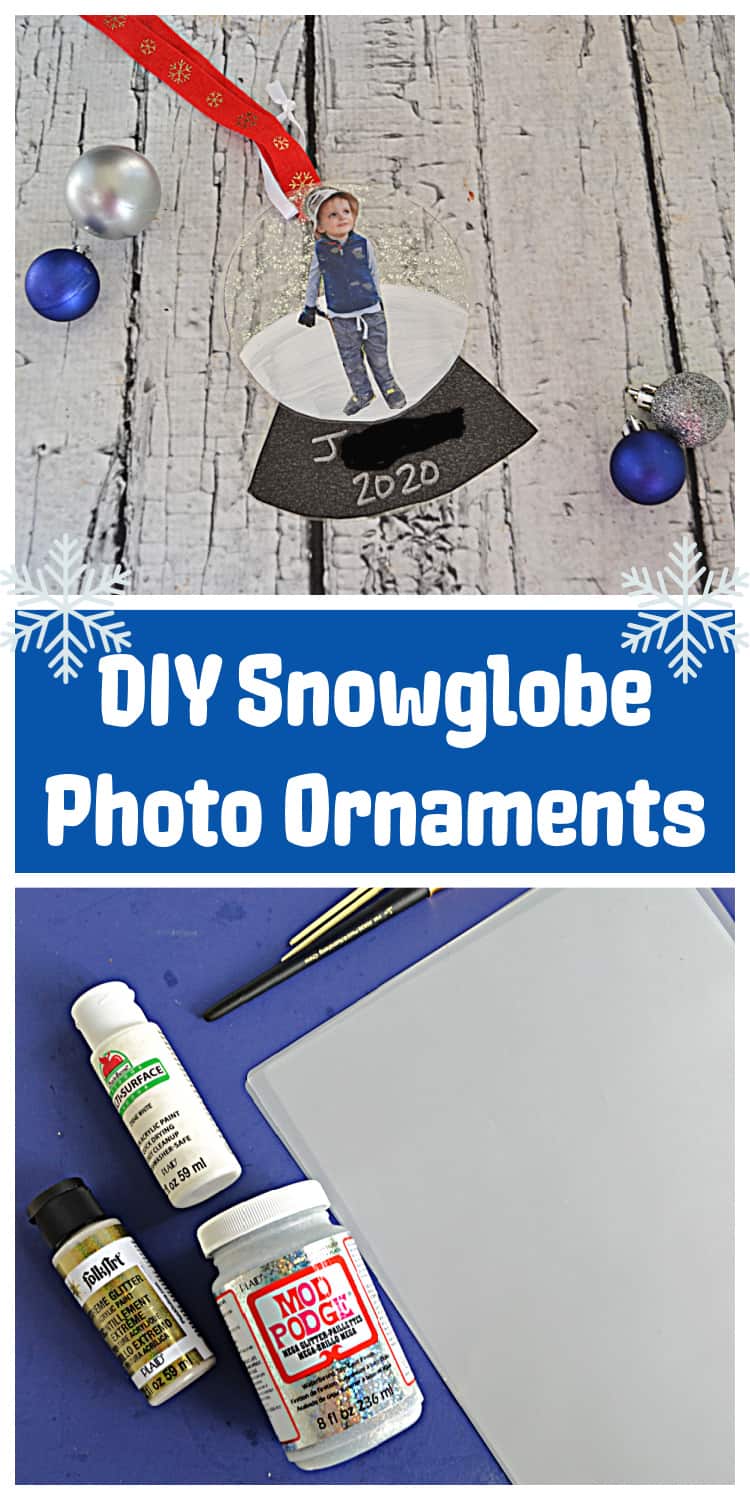
Supplies for this craft:
- laminator
- laminating sheets
- white paint
- silver or gold glitter paint
- black construction paper
- photos
- ribbon
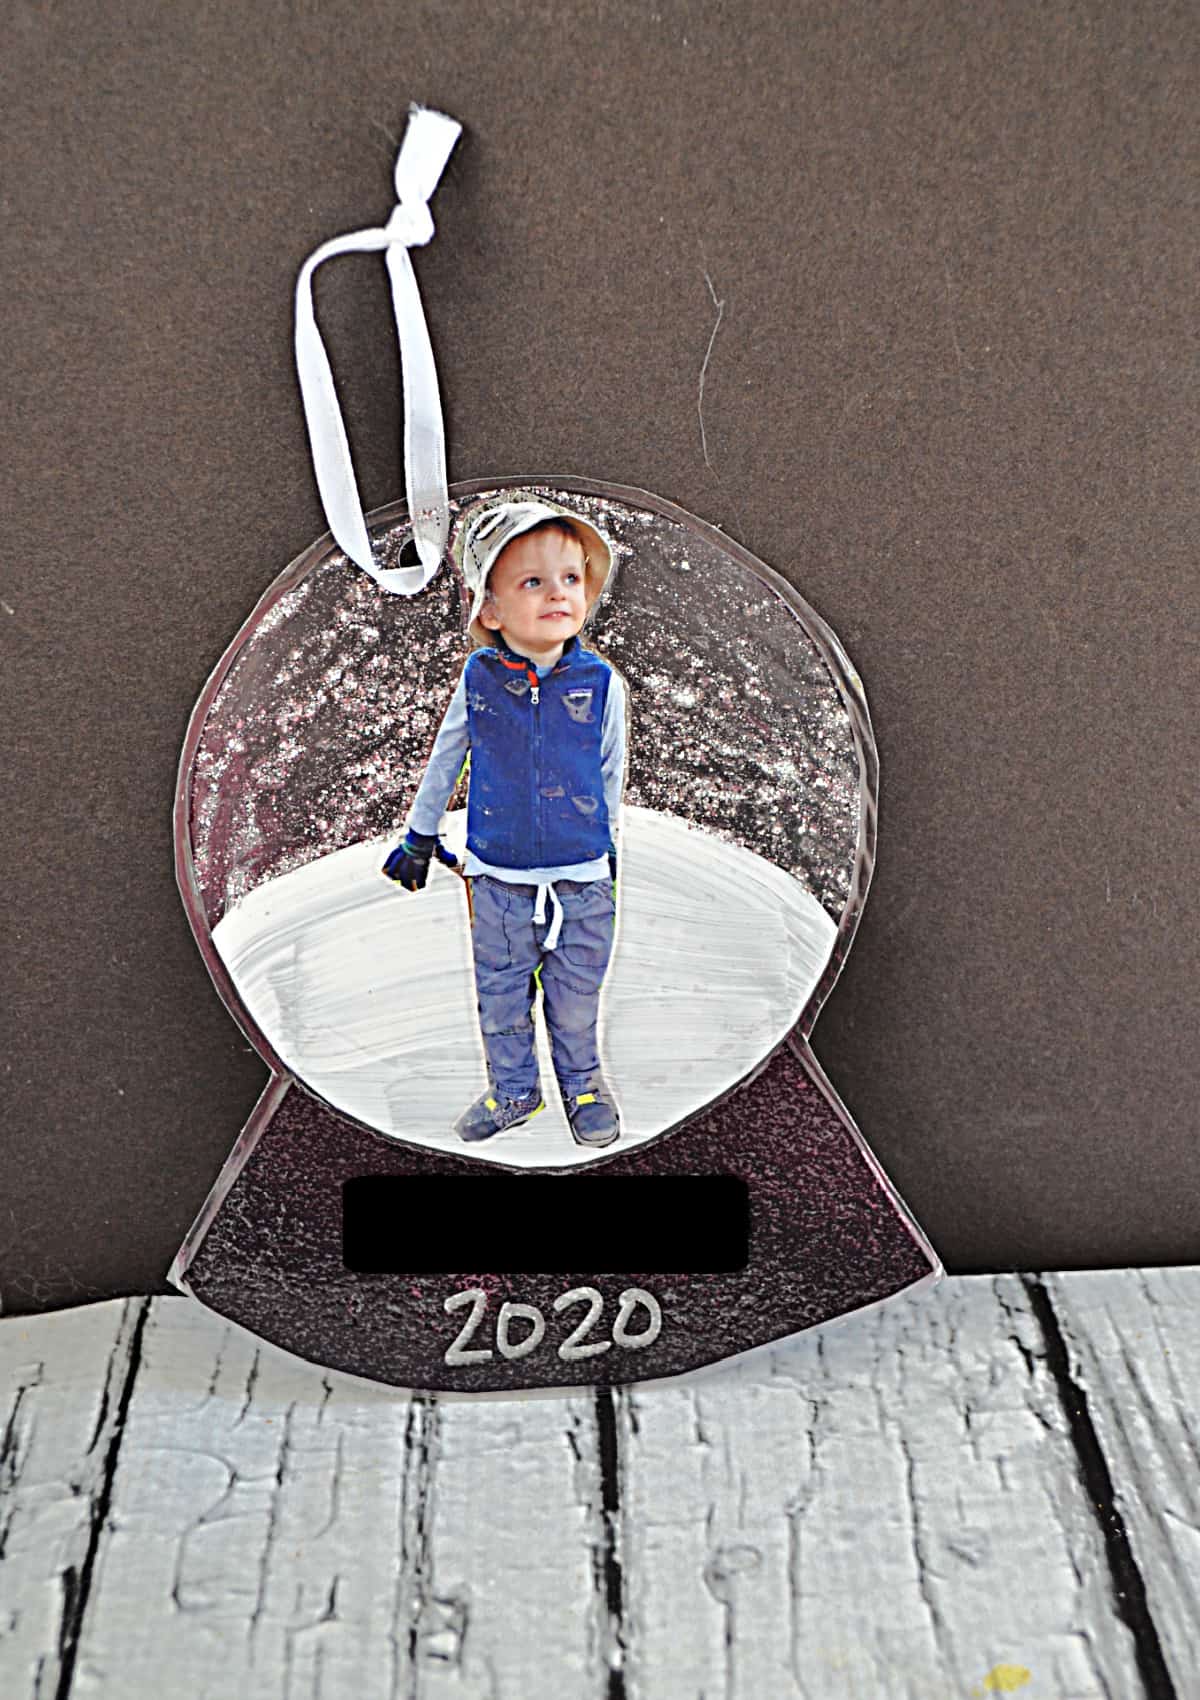
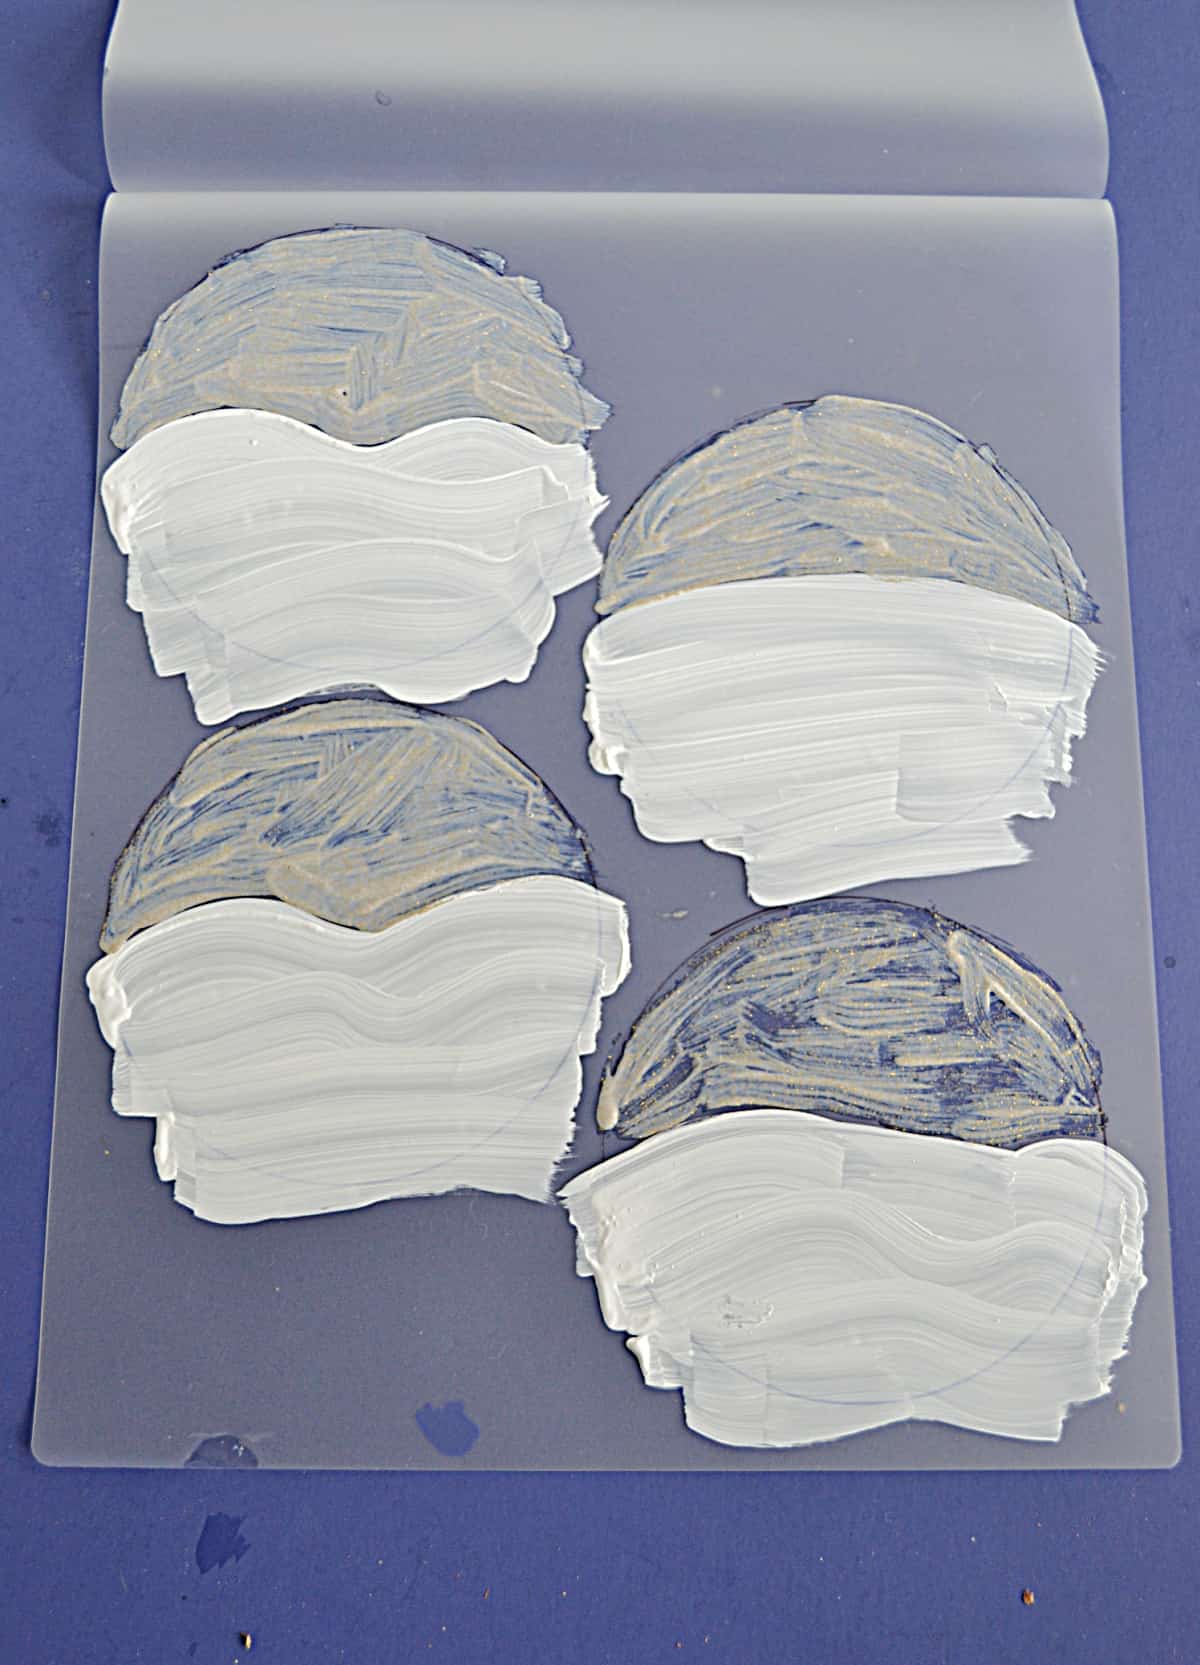
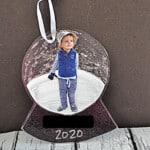
To make the snowglobes I opened the laminating paper and traced 4 circles on the page using one of J’s snack bowls. You can use any circle that is 3-4 inches in diameter. Then I painted the bottom half of the circles with white paint to make the snow.
On the top half of the circles you can either paint white dots for snow or use silver or gold glitter paint to look like snow is falling. I tried all three ways and they all look fine but I felt like the silver glitter looked the most like real snow.
Then I placed the photo of J in the painted circle so that it looked like he was in the snowglobe. You could glue or tape it down but I just carefully shut the laminating sheet and put it through the laminator to make it stick. Then I cut out the circles.
After that I simply cut out a snowglobe base from black paper and put that on the bottom of my laminated snowglobes and stuck the whole thing in another sheet of laminating film. Then I laminated it again.
What can I do if I don’t have a laminator?
You can buy self-sealing laminator pouches at any craft store. Companies realize not everyone has a laminator at home so this is a great way to laminate things at a low cost.
Can I use regular glitter instead of the glitter paint?
You sure can! Just use a clear glue or Modge Podge on the top half of the ornament and then sprinkle the glitter over top of that in a very thin layer and let it dry before sealing it up.
I don’t have any photos of my child in the snow. What can I do?
You don’t need photos of them in the snow because you are making the snow. In fact, in the photo of J on the sled there wasn’t any snow, he just liked to sit on the sled! If you don’t have any good photos just have your child dress up in winter clothes and pose them outside. You are cutting their photos out so the background doesn’t matter.
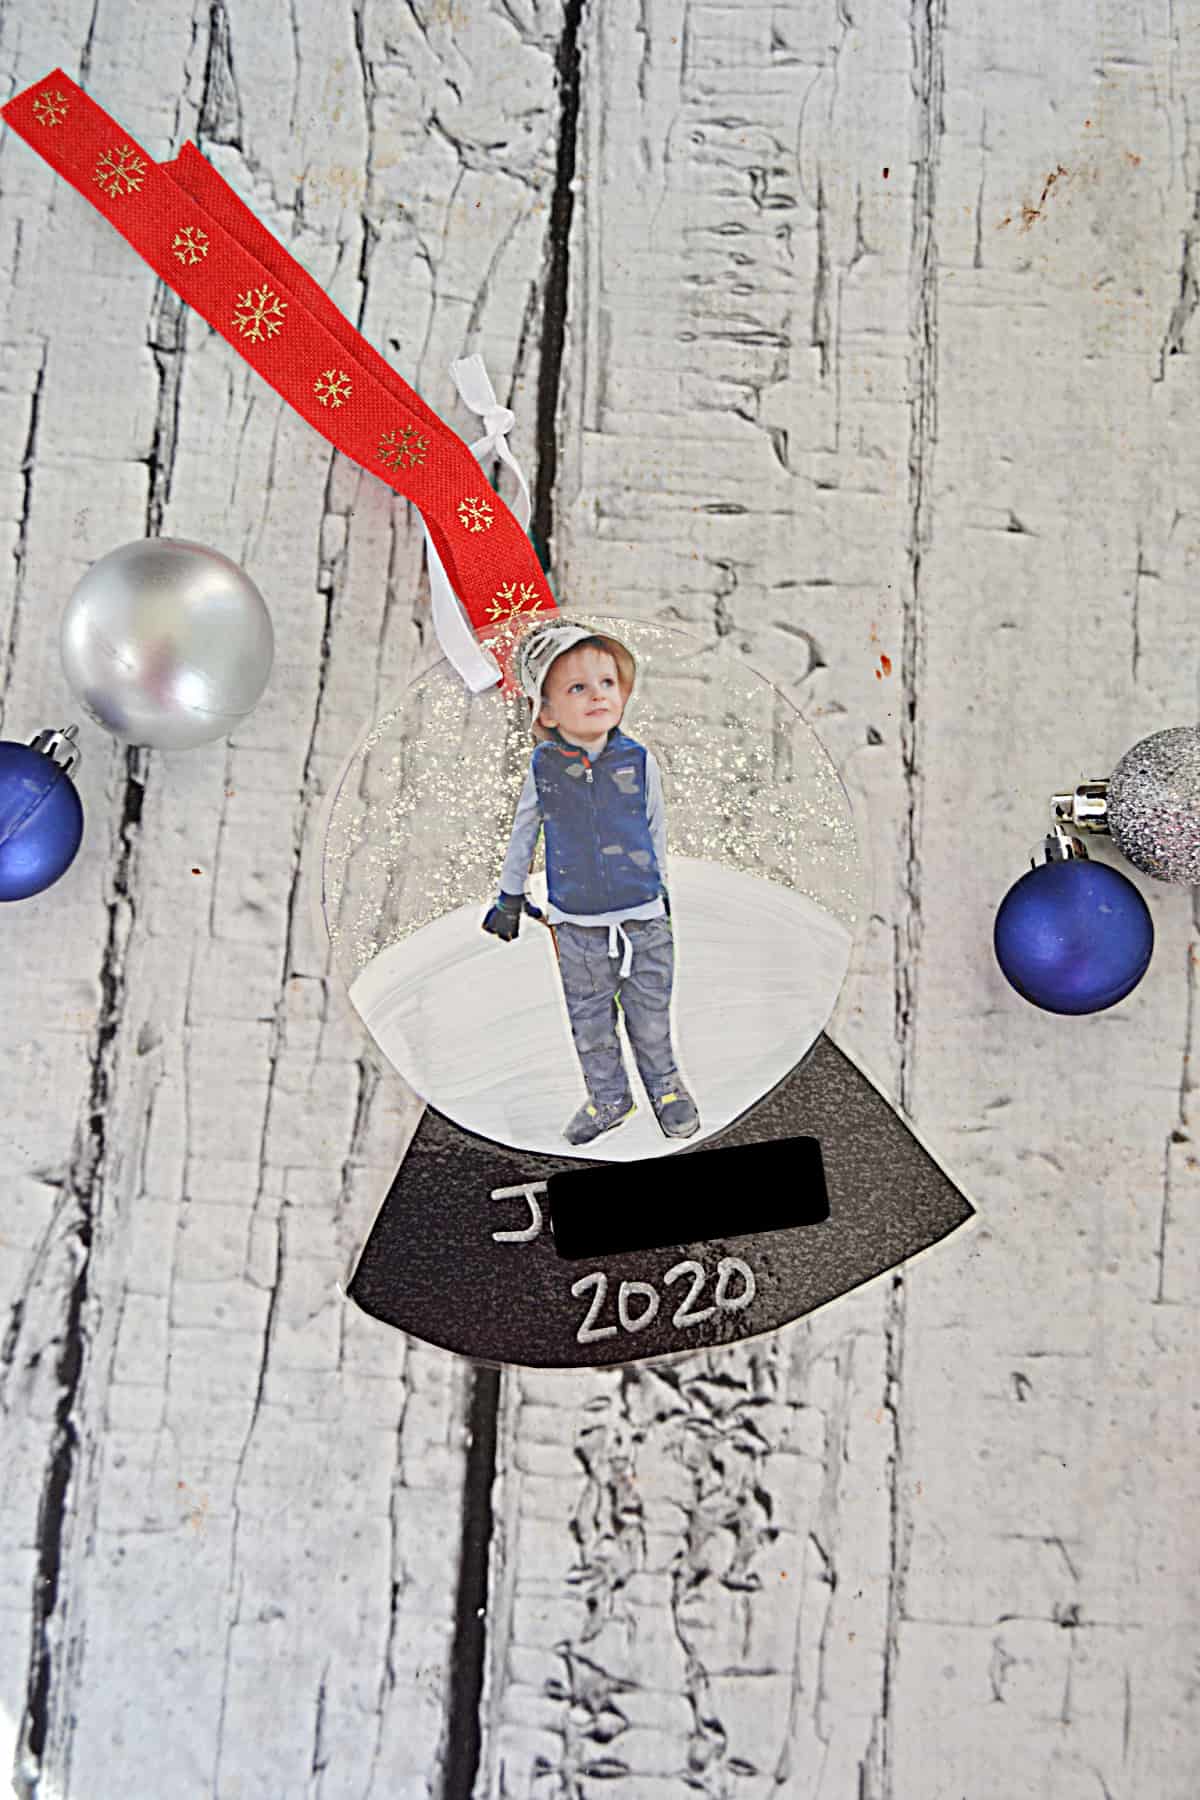
Last thing to do is punch a hole in the top and put ribbon in it. Use something pretty that you’d like to see hanging from a tree. Glittery holiday ribbon, rustic string, or gauzy ribbon are all good choices.
These took me about 2 hours to make because of waiting for the paint to dry but hands on time was around 30 minutes for 8 ornaments and now I have holiday gifts for all of our family members!
These ornaments are great for grandparents because they can have a picture of the child on their tree. Because it’s inside a snow globe they could actually hang it in the house all winter long and it would totally be appropriate.
If you’ve tried my DIY Snowglobe Ornaments or any other craft on Hezzi-D’s Books and Cooks please take a minute to rate the recipe and leave a comment letting me know how you liked it. I love hearing from you! You can FOLLOW ME on:
DIY Snowglobe Photo Ornaments
Materials
- Laminator
- Laminating sheets I needed 5
- White paint
- silver or gold glitter paint
- black construction paper or cardstock
- ribbon
- photos
Instructions
- Open two laminating sheets and use a small bowl or mouth of a jar to trace four 3-4 inch circles on each of the sheets.
- Paint the bottom half of each circle with white paint. Make it into an arc so it looks like the snow has mounded up in the middle.
- On the top half you can either use the white paint to make dots that looks like snowflakes or use the silver or gold glitter paint to make it look like it is snowing.
- Wait 1-2 hours for the paint to completely dry.
- Cut out each of the photos so that there is no background. Position the image on the painted circle so that it looks like the child is playing in the snow. You can use glue of tape but I simply placed all four photos and carefully shut the laminating sheet.
- Laminate both sheets.
- Cut out the circles.
- Cut out a base for each of the 8 circles using the black paper. I used one of the circles to help make a template.
- Use a silver or gold Sharpie to write the child's name on the base along with the year.
- Place the snowglobe on top of the base and place in another laminating sheet. I was able to fit three per sheet. Laminate the sheets.
- Cut out the snowglobe and base. Punch a hole in the top and put a ribbon through it. Tie the ribbon to make a hanger to put on the tree or to use as a gift tag.
Notes
