Mario Cookies (Stars and Dino Eggs)
As an Amazon Associate, I earn from qualifying purchases. Read the full disclosure here.
My little cousin just had his 13th birthday. He decided he wanted a video game party. He wanted his cake to be video game related and cookies as well. He told his mom that he wanted me to make his cake and cookies because, in his words, “Hezzi can make anything”.
I was on the hunt to find some cookies and a cake I could make that he would like. He kept sending me photos of elaborate cakes that I knew I couldn’t do. I chose 3 cakes and 12 different cookies and told him to pick 3 or 4 cookies and 1 cake. After some debate he was able to chose what he wanted.

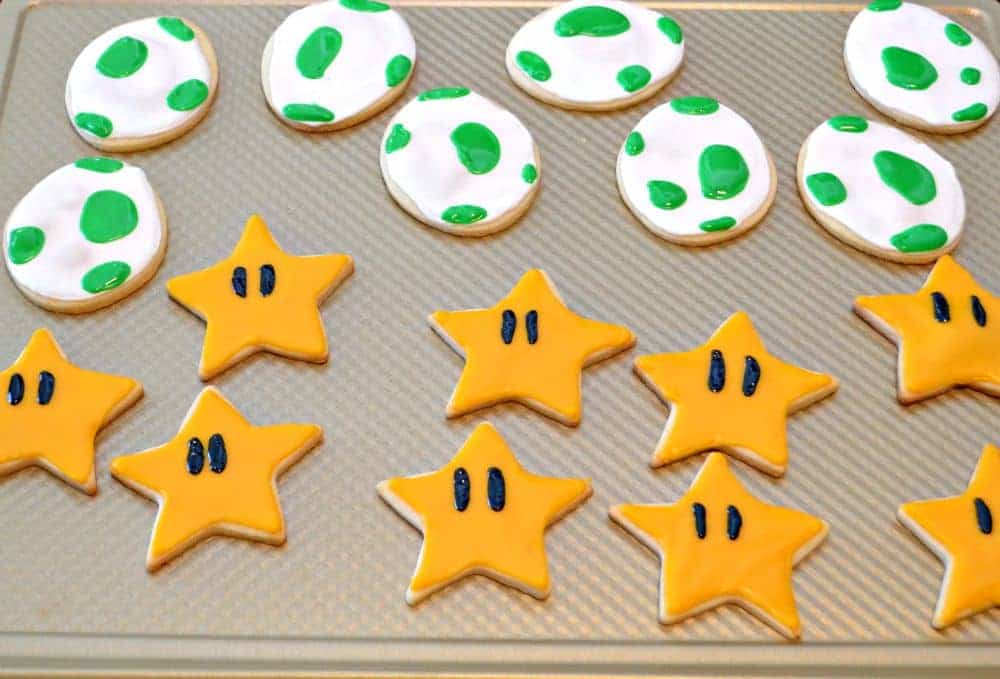
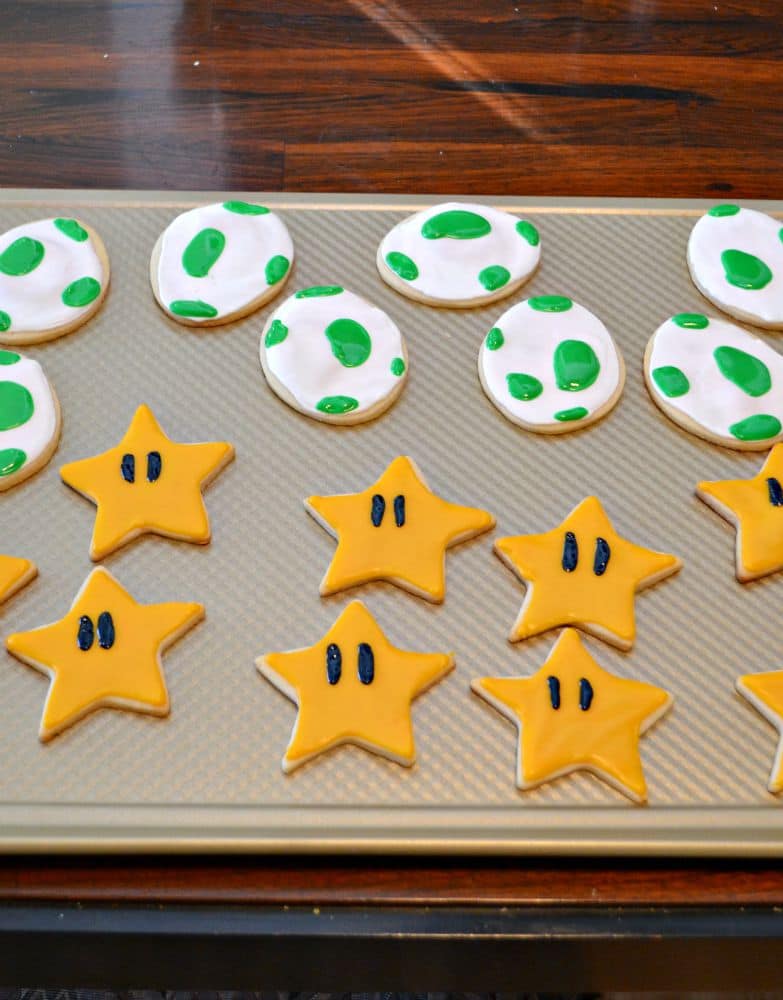
For cookies he wanted 2 Mario themed cookies and 2 Zelda themed cookies. For the Mario cookies he picked the star and the dinosaur eggs. I was happy he picked both of these because they were really easy to make and turned out so cute.
I used my favorite cookie recipe, cut out the shapes, and baked. The next day I decorated them with royal icing. The stars were frosted with yellow icing then I used white and black for the eyes. With the eggs I used white icing and green icing for the spots. My little cousin loved them and I thought they were pretty cute too!
Mario Cookies (Stars and Dino Eggs)
Ingredients
For the cookies:
- 2 1/2 c. flour
- 1 teaspoon baking powder
- 1/2 teaspoon salt
- 2 sticks butter softened
- 1 c. sugar
- 1 egg
- 1 teaspoon vanilla
For the frosting:
- 3-4 c. powdered sugar
- 1 Tablespoon meringue powder
- 1 teaspoon vanilla
- 3-4 Tablespoons water
- black green, yellow food coloring
Instructions
- In a medium mixing bowl combine the flour, baking powder, and salt.
- In the bowl of a stand mixer beat the butter until smooth. Gradually add in the sugar and continue mixing on medium until fluffy.
- Add in the egg and vanilla and beat until mixed well.
- Place the mixer on low and add in the flour mixture, mixing until just blended.
- Knead the dough into a ball and flatten into a disc shape. Cover with plastic wrap and refrigerate for at least an hour or overnight.
- Preheat the oven to 375 degrees.
- On a lightly floured surface roll the dough to 1/4 inch thick. Cut the cookies using a 3 inch star cutter and a 4 inch oval (egg shaped) cookie cutter. Place the cookies on a baking sheet and bake for 6-8 minutes or until they no longer look wet on top.
- Remove from the oven and allow to cool for 2 minutes on the cookie sheet before removing to a wire rack. Cool completely.
- To make the royal icing put3 cups of powdered sugar, meringue powder, vanilla, and 2 tablespoons of water in a bowl. Mix well until combined. Add more powdered sugar or water as needed to reach desired consistency.
- Divide the icing into 4 bowls. 3 bowls will have a large amount of icing and the 4th bowl will have a small amount. Leave one bowl white, tint one bowl yellow, tint another bowl green, and tint the small bowl black.
- Place the white icing in a piping bag and pipe a white line around the edge of the eggs. Thin the remaining white icing and fill in the eggs.
- Place the yellow icing in a piping bag and pipe a yellow line around the edge of the star. Thin the remaining yellow icing and fill in the stars.
- Use the remaining white icing in the piping bag to pipe eyes onto the star. Allow the stars and eggs to dry for 20 minutes.
- Place the green icing in a piping bag. Pipe on green spots all over the egg.
- Place the black icing in a piping bag. Pipe onto the whites of the eyes.
- Allow to dry over night. Place in an air tight container and keep for up to 2 weeks.
Notes
These Mario cookies are absolutely adorable! I love the idea of using dino eggs – it really adds a fun twist. Can’t wait to try this recipe and bring a bit of nostalgia to my baking! Thanks for sharing!
These were so fun to make for my godson! Now I need to make them for my son since he loves Mario!
These Mario Cookies look so fun and delicious! I love the idea of using star and dino egg shapes. Can’t wait to try making them for my next game night! Thanks for sharing this adorable recipe!
They are fun and great for a gaming night! Thank you for the comment!
These Mario Cookies look so fun and creative! I love how you incorporated both the stars and the dino eggs. They would be perfect for a gaming-themed party or just a family baking day. Can’t wait to try making them!
Ah thank you! I made them for my godson’s birthday years ago and then revived them for my sons birthday last year!
Love this dough recipe. It’s so light and buttery.
Thank you! I use it for all my decorated cookies!