Sweet Vanilla Cream and Coffee Battenberg with Chocolate Plastique for Daring Bakers
As an Amazon Associate, I earn from qualifying purchases. Read the full disclosure here.
Mandy of What The Fruitcake?! came to our rescue last minute to present us with the Battenberg Cake challenge! She highlighted Mary Berry’s techniques and recipes to allow us to create this unique little cake with ease. Battenberg cakes are traditional checkered cakes from England. The first Battenberg cake was made to celebrate the marriage of Queen Victoria’s granddaughter, Princess Victoria, to husband Prince Louis of Battenberg.
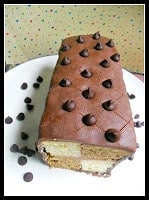
The cake is easier to make then I initially thought. The flimsy foil and parchment divider held tight and worked wonderfully. The hard part for me was cutting the cake into identical sized pieces. I had bits and pieces of each of the cakes all over the kitchen by the time I was done trimming them.
I also had some difficulty with the chocolate plastique. It was easy to make but when it’s time to use it the chocolate is hard as a rock. I broke it into 6 pieces and kneaded each piece for several minutes until I was able to piece them together and roll them out into one sheet. Once the cake was wrapped in the chocolate I was amazed by just how pretty it was. I loved the look of the cake and think it would be lovely at an anniversary party or wedding. There are many different flavor combinations I can’t wait to try now that I know how to make this cake.
Chocolate Buttercream
1 stick of unsalted butter, room temperature
3 T. cocoa powder
2 c. powdered sugar
2 T. milk
1. Using a mixer beat together the butter and cocoa powder. Add in the powdered sugar until the mixture is stiff. Add in enough milk to make the buttercream the desired consistency. Refrigerate until ready to use.
Chocolate Plastique
3 T. corn syrup

2. Once it is melted remove the chocolate from heat and allow to cool for several minutes.
3. Add in the corn syrup. It will seize up but keep stirring until it is well combined and the chocolate pulls away from the side of the bowl.
4. Place the chocolate in a zip top bag and flatten.
5. Refrigerate for at least 2 hours or overnight.
Sweet Vanilla Cream and Coffee Battenberg with Chocolate Plastique (adapted from Mary Berry’s “Baking Bible”)
3/4 c. unsalted butter
3/4 c. caster sugar
1 1/4 c. self raising flour
3 eggs
1/2 c. ground almonds
3/4 t. baking powder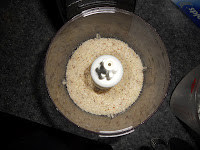
1 T. sweet cream
2 t. espresso powder
1. Preheat the oven to 350 degrees.
2. Butter an 8 inch square pan with butter.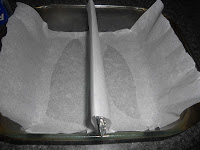
4. In a large bowl combine the sugar, flour, ground almonds, and baking powder.
5. In a medium bowl beat together the butter and eggs. Add the butter mixture to the flour mixture and stir until smooth.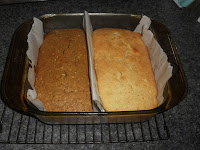
7. Bake for 25-30 minutes or until the cake springs back when lightly touched and a toothpick inserted in the middle comes out clean.
8. Remove from oven and let cool for 5 minutes before removing from the pan and cooling completely on a wire rack.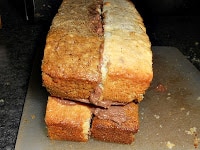
10. Trim the strips so that they are all the same size.
11. Place one vanilla piece of cake and one coffee piece of cake next to each other. Spread the side with chocolate buttercream and stick them together. Repeat with the other two pieces making sure they are on opposite sides.
12. Then place a layer of chocolate buttercream on top of two of the strips. Place the other two strips on top t form the checkered pattern. 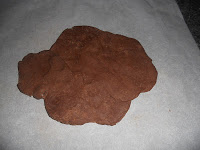
14. Spread a thin layer of buttercream on the top of the cake. Place the cake on the chocolate plastique, buttercream side down. Spread a thin layer of buttercream on the sides of the cake and press the chocolate plastique against it, gently wrapping the cake.
15. Carefully flip the cake over so that the seam in underneath the cake. Lightly cut a crisscross pattern into the top of the cake and dot it with chocolate chips.
16. Straighten up the sides of the cake and cut a thin piece off the front and back to reveal the pattern and to remove excess chocolate plastique.
This post linked to:
What’s Cooking Wednesdays, Cast Party Wednesday,


Nice job on this. Very impressive!
Looks just great. I managed to miss the cut off for the linky this time …sigh. Have a super week.
PS My Food on Friday is on chocolate – you are most welcome to link this up
You cake came out super cute! I totally lost track of time this month and forgot to do the challenge cake!
How impressive!! This looks amazing!! A work of art, really.
Wow! You’re brave. LOL I laughed about having pieces of cake all over the kitchen. I think the flavors you chose sound yummy!
looks wonderful! Good job!
That looks amazing! I’m definitely gonna try this for my next pot luck. I have a cake slicer for stacked cakes that I think would make it easier to make uniform sizes. Very cool!
That looks great! I always want to try something like this and then never have the guts 🙁
This is such an impressive dessert…and looks delicious!