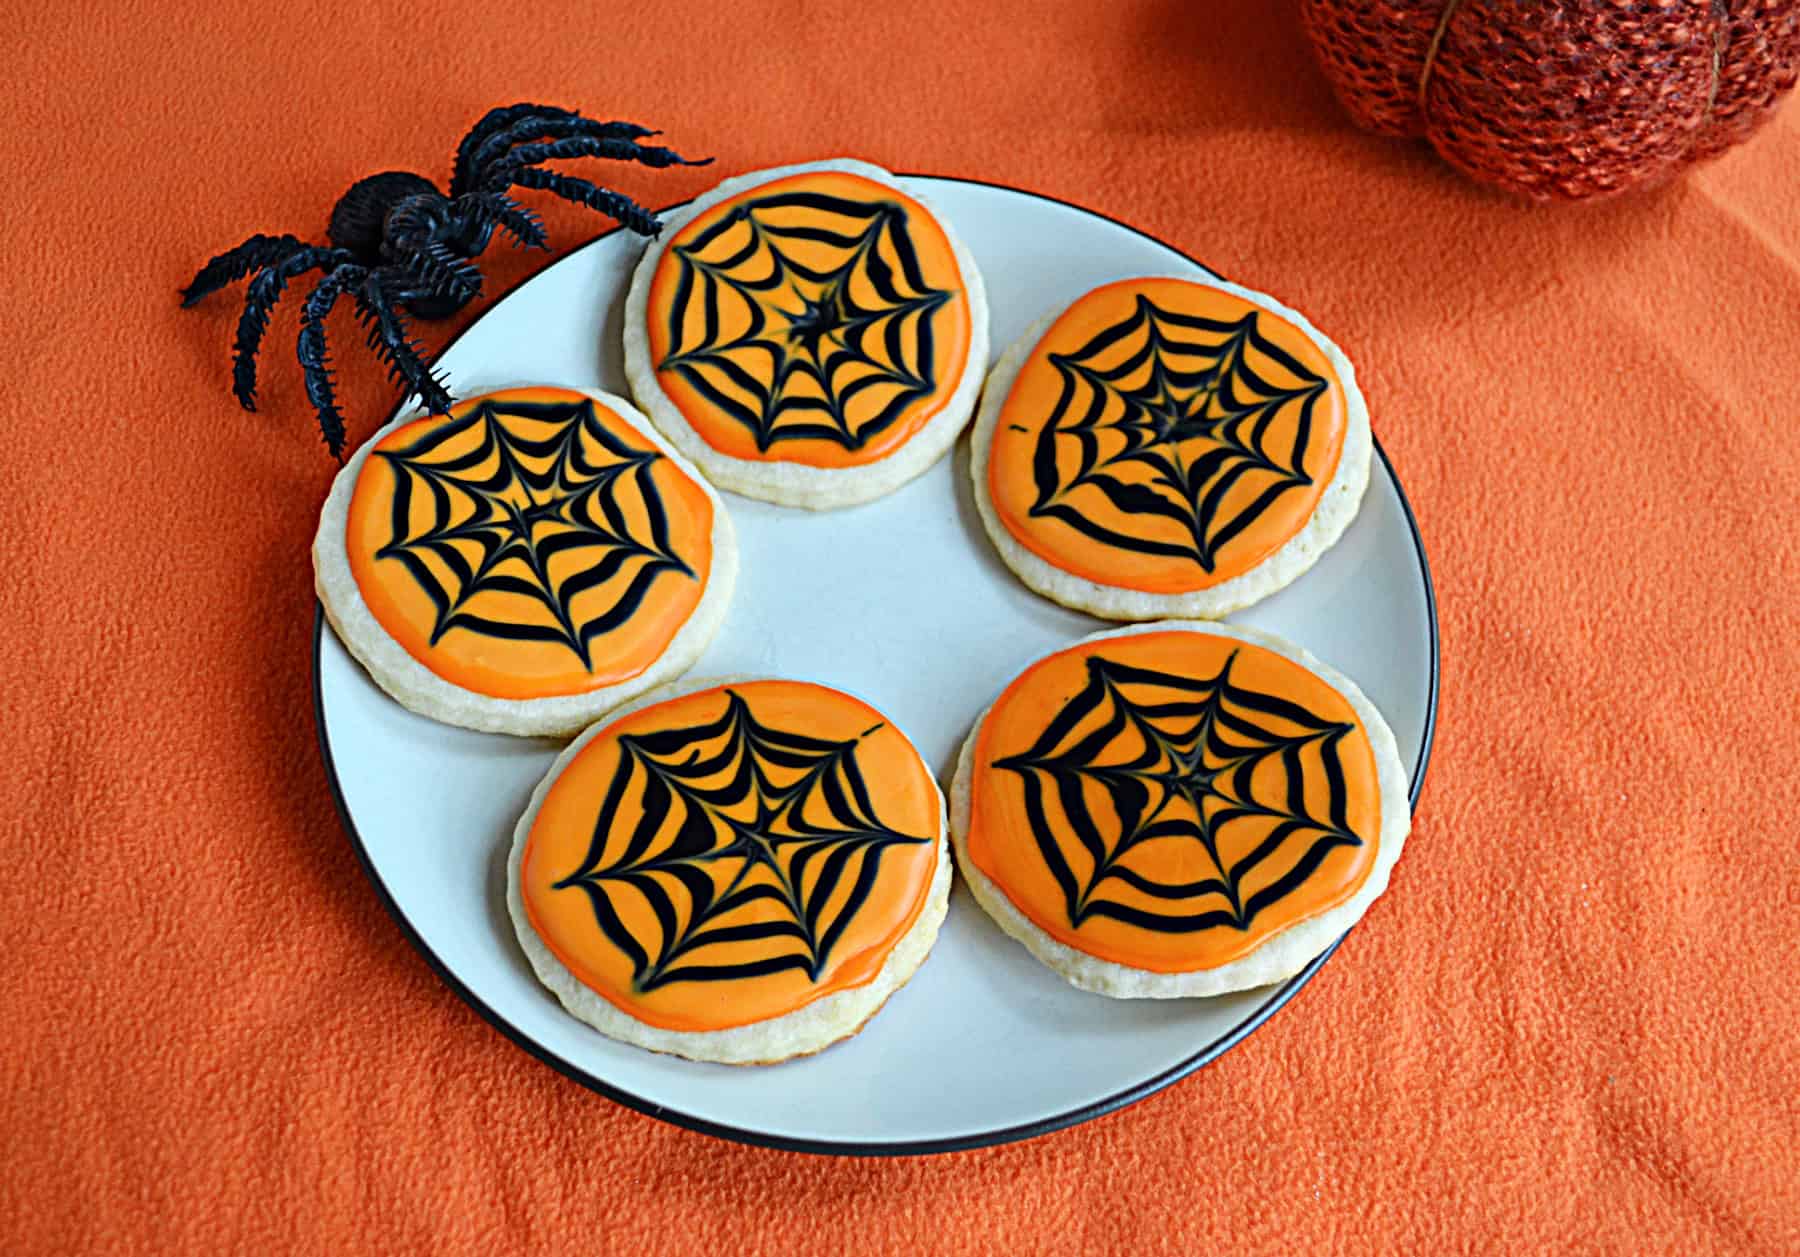
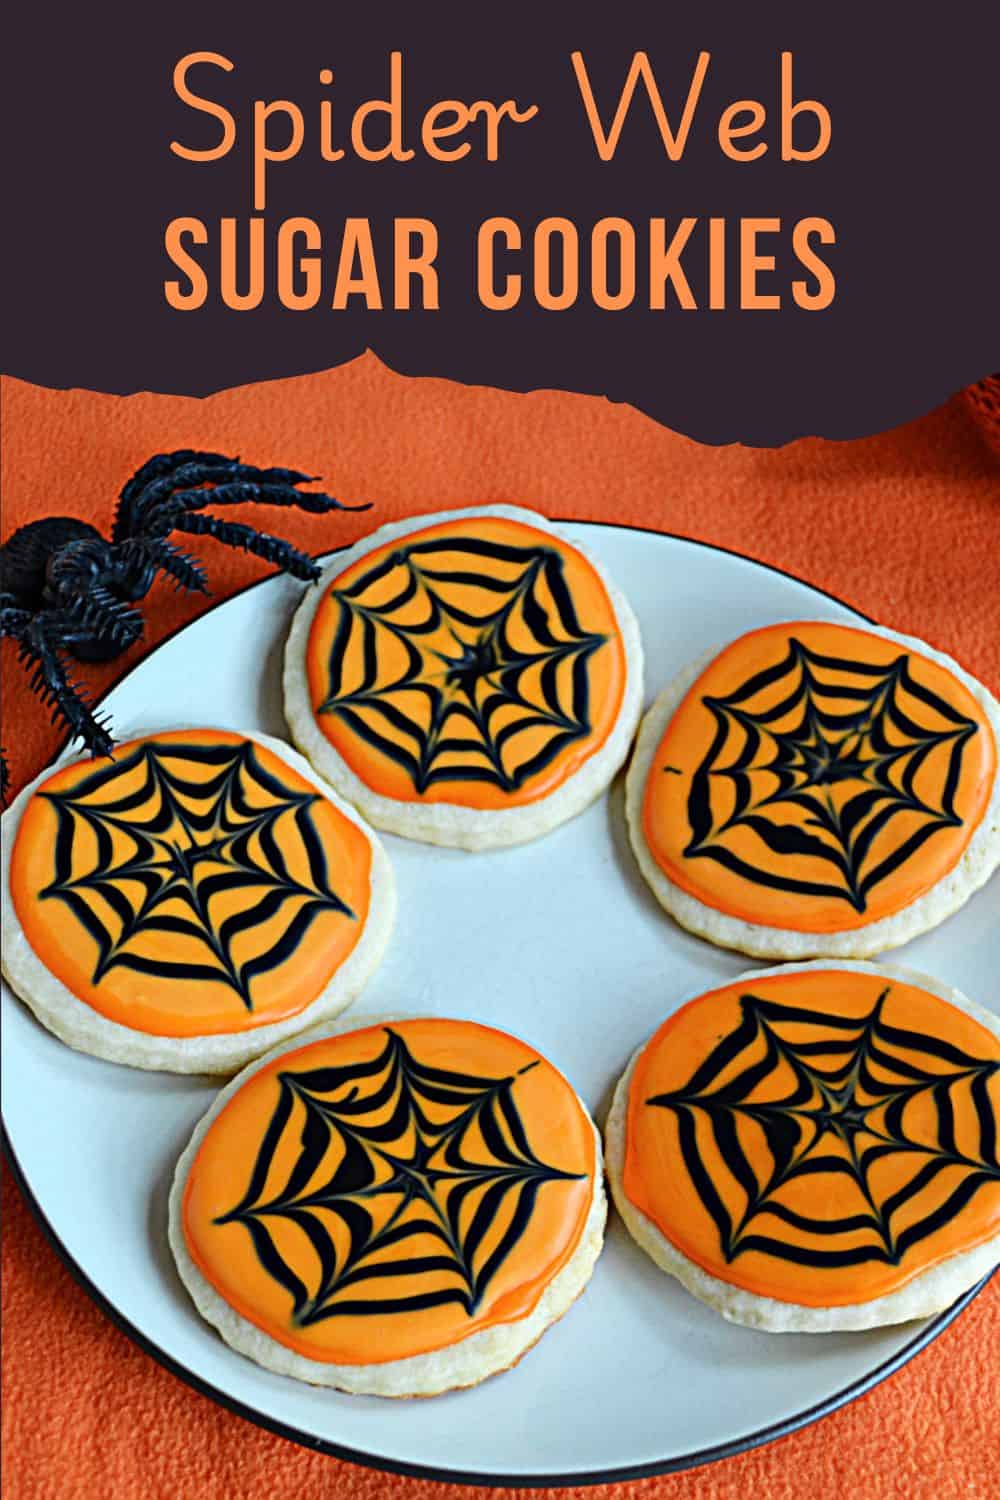
Spider Web Sugar Cookies

As an Amazon Associate, I earn from qualifying purchases. Read the full disclosure here.
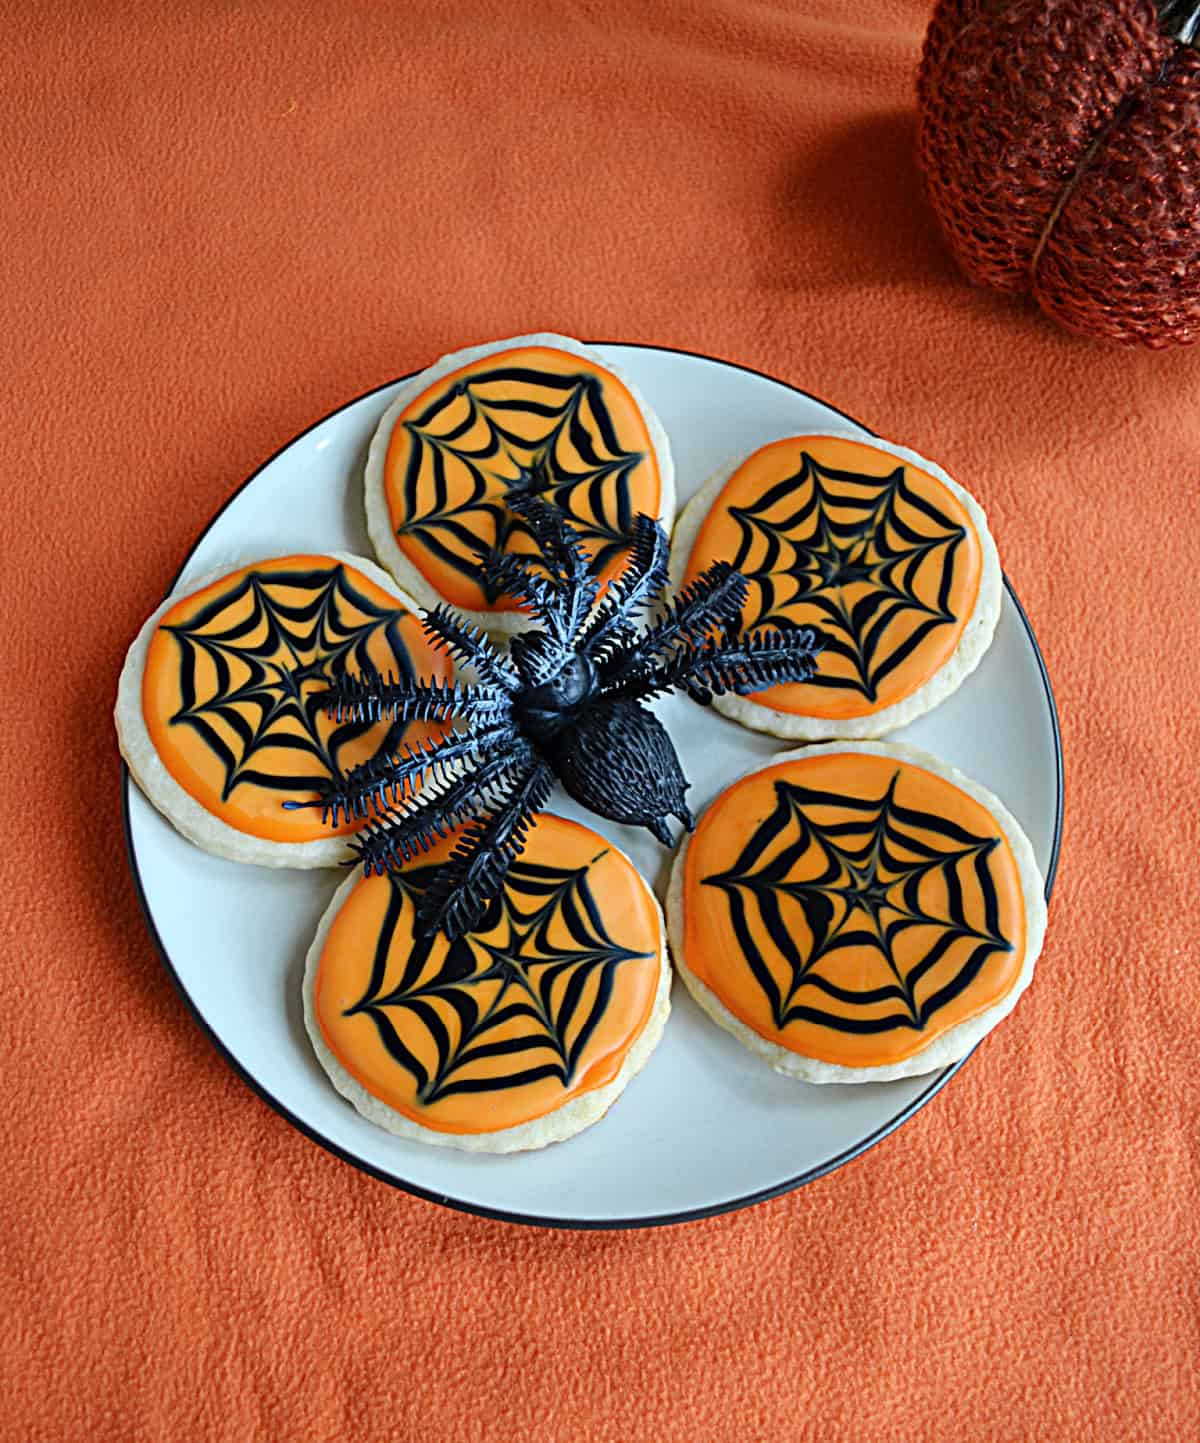
These buttery sugar cookies are as wickedly delicious as they are spooky! Each one is topped with royal icing in a bold orange and black spiderweb design. They are perfect for Halloween parties or a sweet October treat. Crisp on the edges, soft in the center, and hauntingly beautiful.
This post originally published in October 2012.
I really enjoy making decorated sugar cookies. Until my son was born I actually made and sold some of my cookies both on Etsy and locally.
My favorite decorated sugar cookies are these Alice in Wonderland Cookies. They were my best seller as well. For a tastier frosting I’ve made these Christmas Tree Sugar Cookies with buttercream frosting decorations. I even made these Gluten Free Lego Sugar Cookies for a friend.
This year I wanted to make a fun Halloween cookie. I actually made these years ago but I thought it was time to try them again.
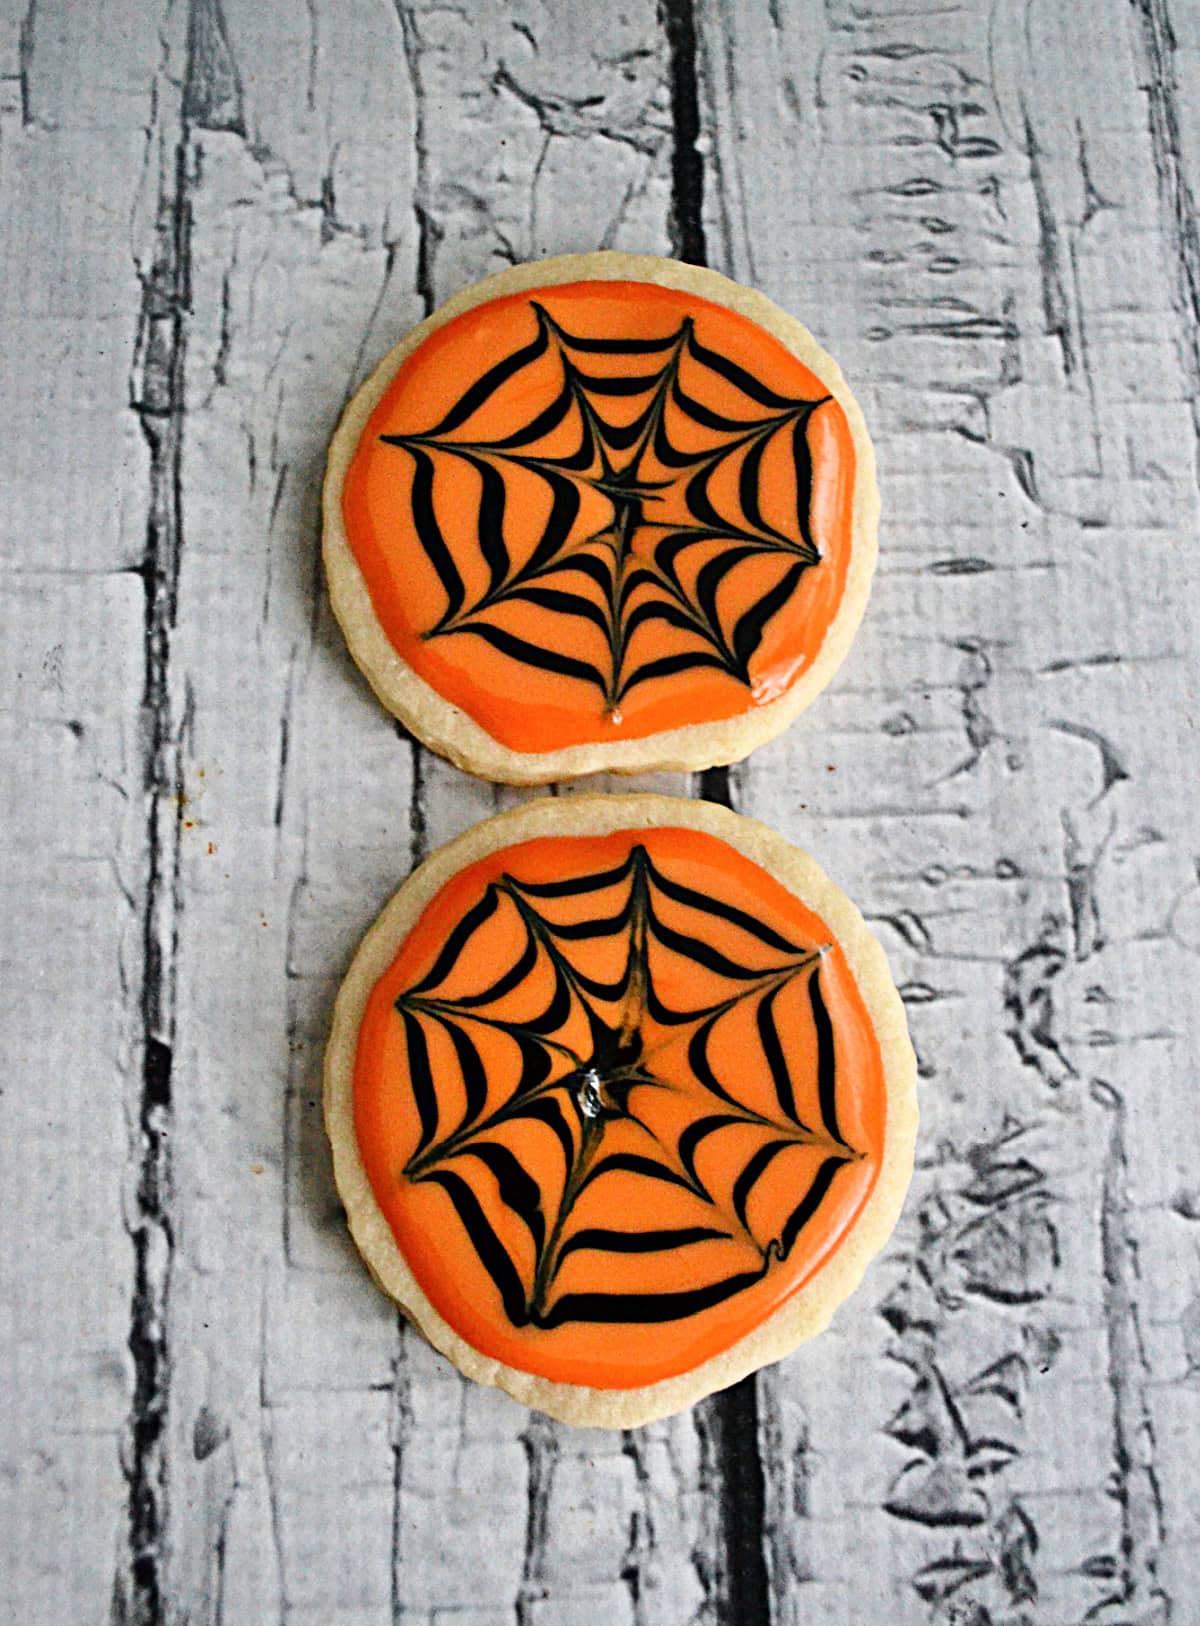
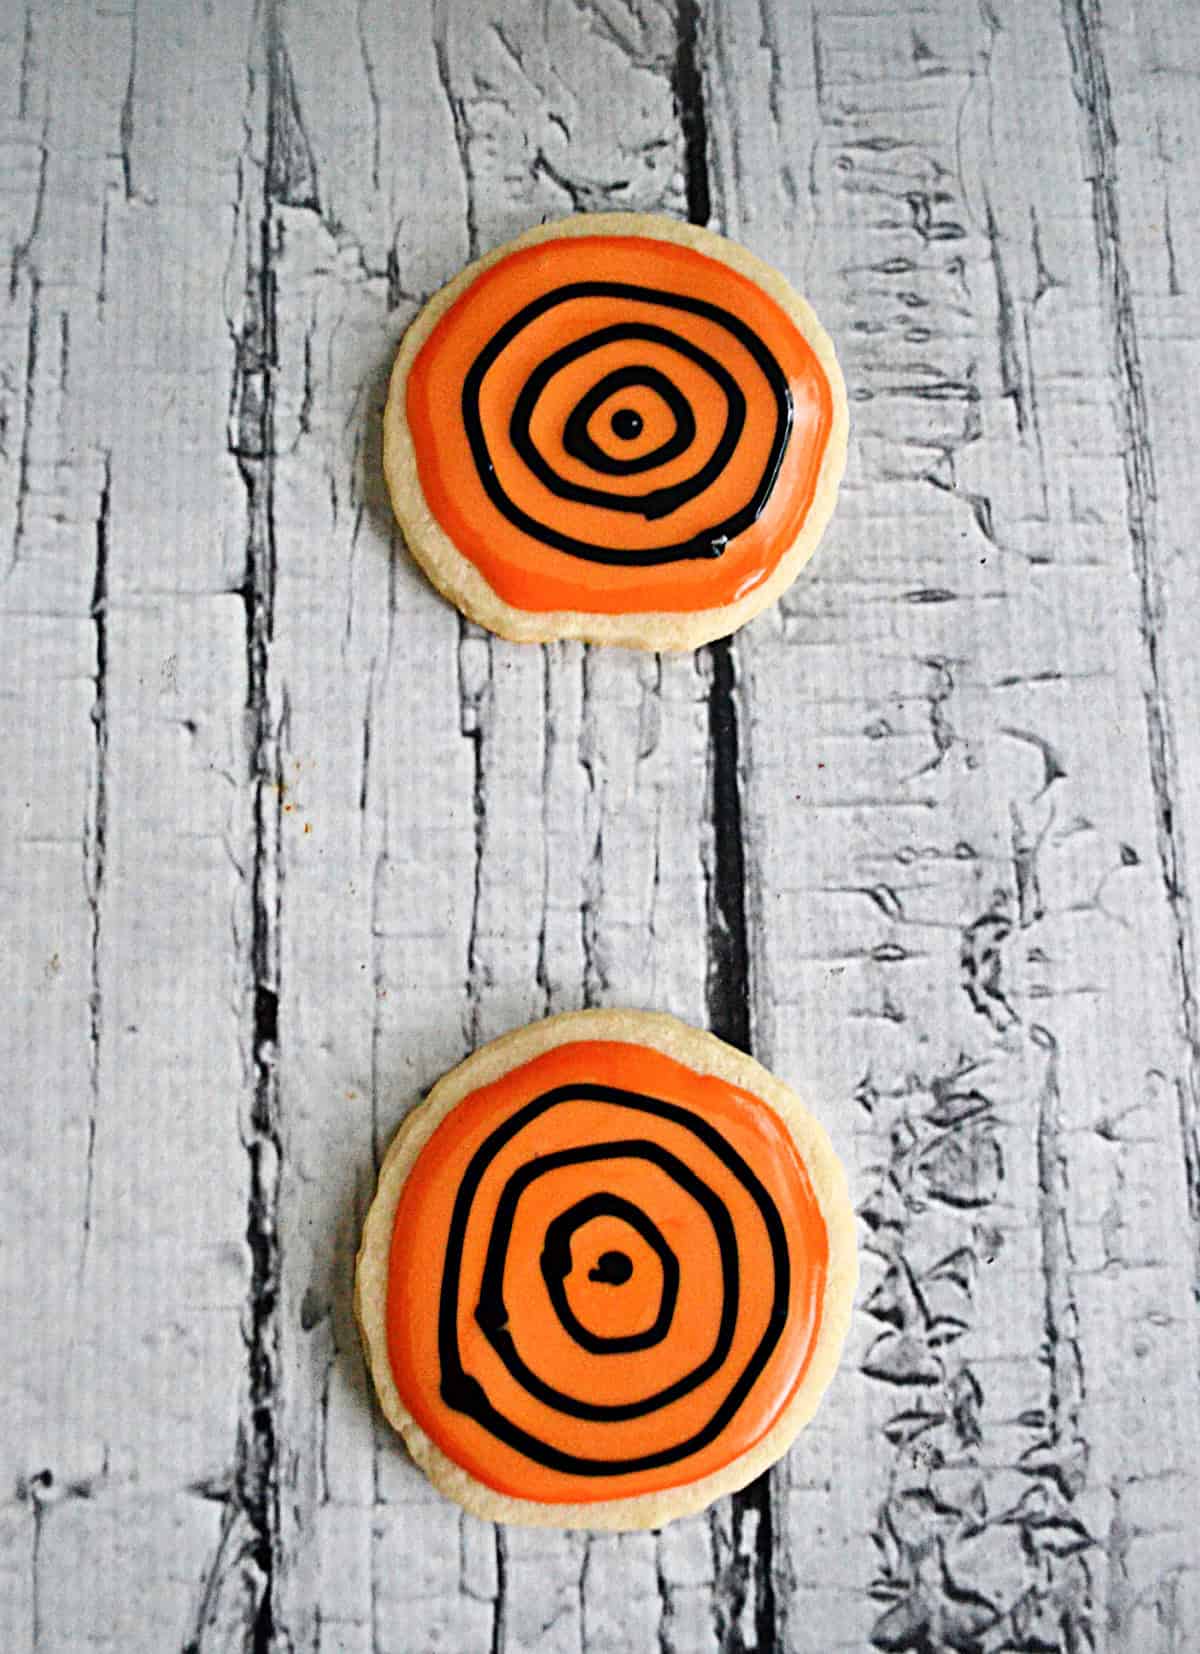
Spider web sugar cookies are delicious buttery sugar cookies that are topped with orange and black royal icing in a spider web pattern.
What is royal icing?
Royal icing is a smooth, hard drying icing made from powdered sugar, egg whites (or meringue powder), and water. It is often colored with food coloring. Check out one of my favorite Royal Icing Recipes.
These cookies are a good way to get into decorating cookies with royal icing because there are only two colors of icing and it’s a simple design. Once you get a feel for royal icing you can start doing more intricate designs.
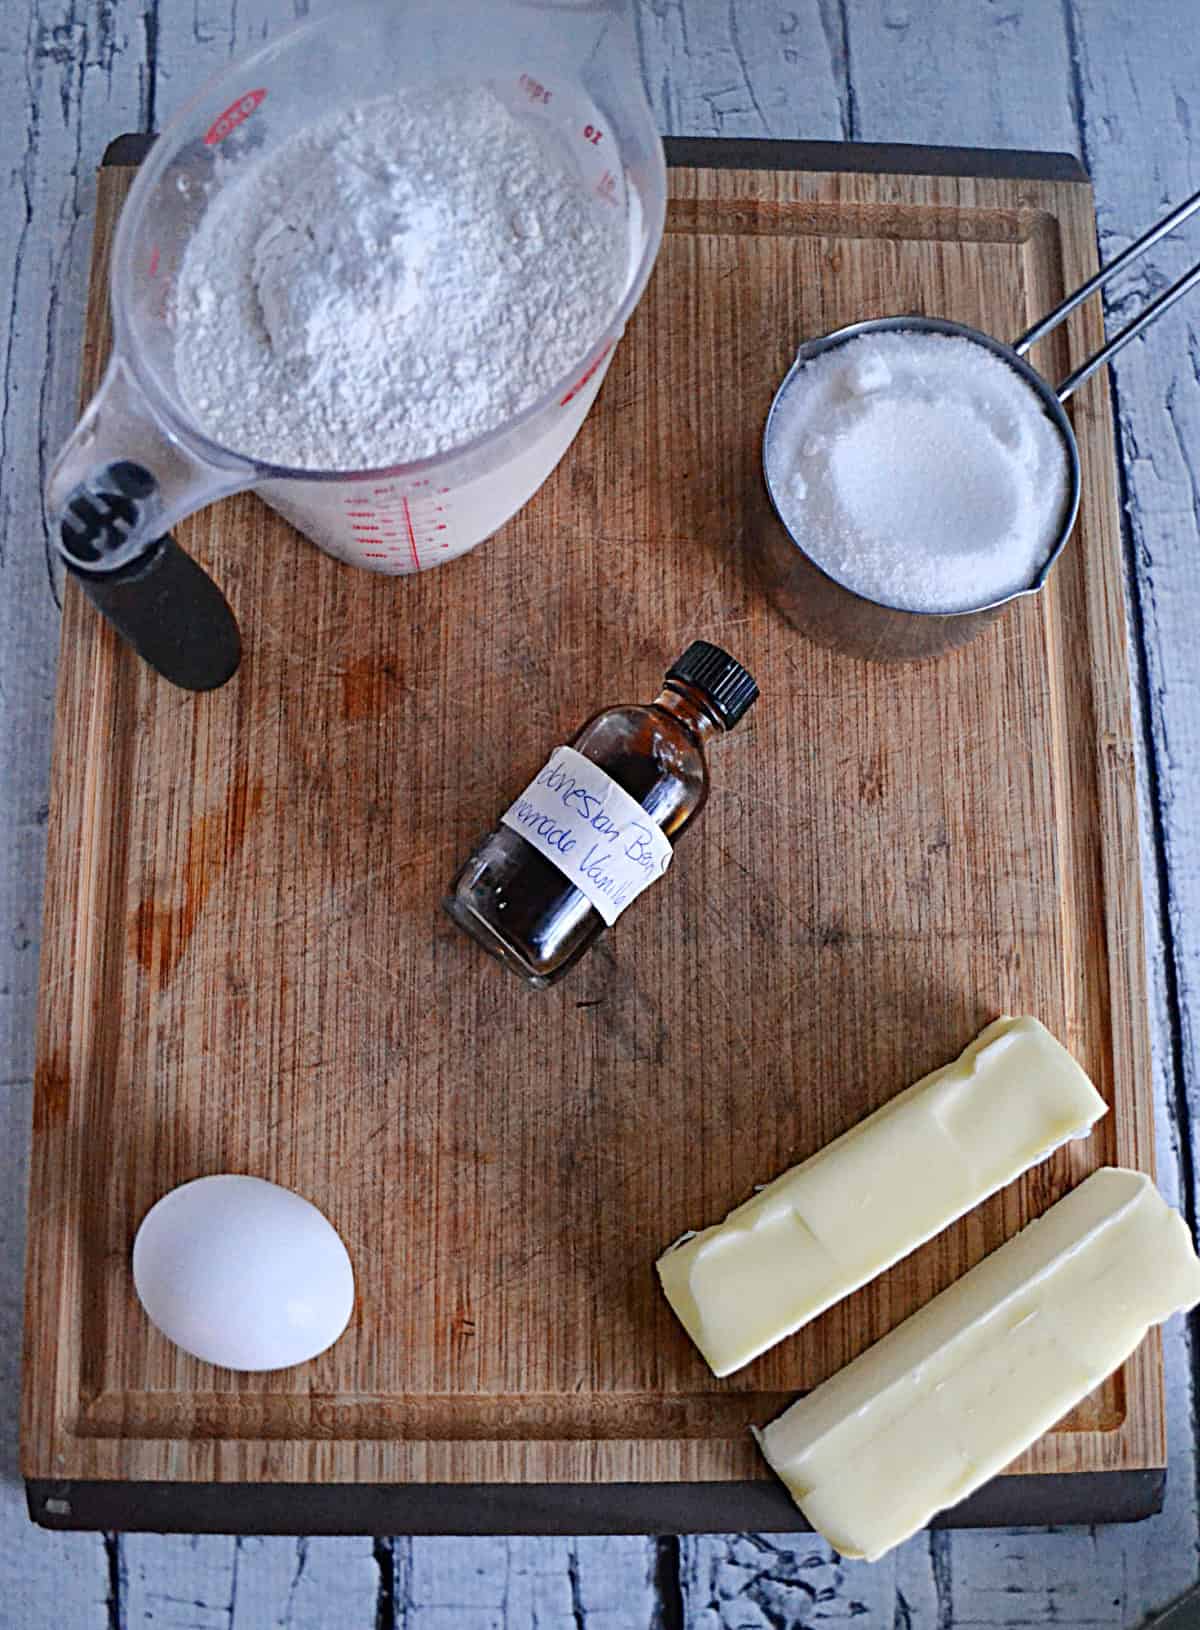
Ingredients:
- all pupose flour
- baking powder
- salt
- salted butter (or unsalted if you prefer)
- granulated sugar
- egg
- vanilla extract (or substitute almond or lemon if you want!)
- royal icing (see above for recipe)
To make the cookies combine the flour, baking powder, and salt in a bowl. Place the butter in the bowl of a stand mixer and beat until smooth. Add in the sugar and mix until fluffy. Add in the egg and vanilla and mix well. Reduce mixing speed to low and add the flour, mixing until just combined.

Gather the dough and shape into a flat disc. Cover in plastic wrap and refrigerate at least one hour or overnight.
Why do I refrigerate the dough before baking?
Refrigerating the dough before baking helps with texture, flavor, and shape control. Chilling the dough solidifies the butter which helps the cookies retain their shape in the hot oven. Cold dough produces cookies with a slightly thicker, softer center because they don’t spread as quickly during baking. Chilling the dough gives it time to rest and lets the vanilla or other extracts deepen.
Can I freeze the dough?
Yes! Wrap the dough in plastic wrap then place in a freezer bag before putting in the freezer. Cookie dough can be frozen for up to 3 months. When ready to use thaw in the refrigerator overnight.
Remove the dough from the refrigerator and roll out to 1/4 inch thickness on a floured surface. Cut out shapes. Bake at 375 degrees for 6-8 minutes. Cool on a wire rack then decorate with royal icing.
I love the flavor of these cookies. They are rich and buttery. They are firm enough to pack up and take with you yet they are soft in the middle. The icing adds a bit more sweetness to the cookie.
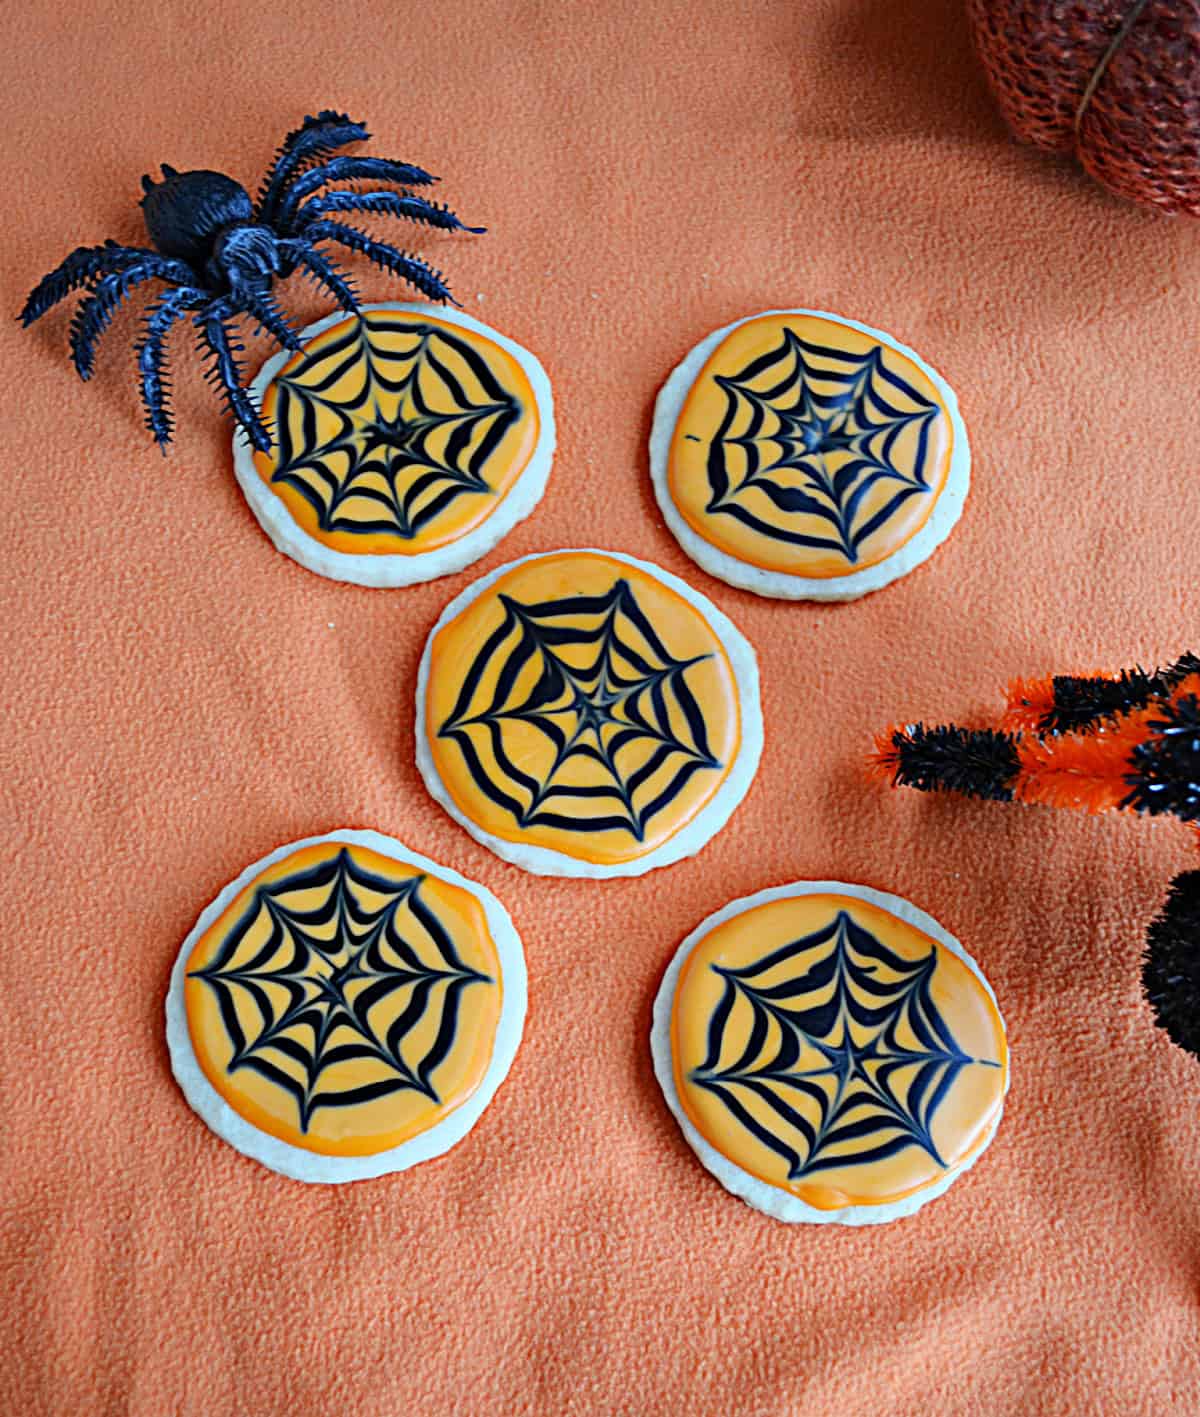
The orange and black are a clear sign of Halloween. I was able to find sugar spiders that I put on the cookies to decorate them. They were a huge hit with my students on Halloween.
These cookies are pretty versatile and you can make them and decorate them with a variety of colors based on the holiday or event. Simply make the cookies with one color then add zig zags, lines, or dots with another color for a colorful holiday treat!
If you’ve tried my Spider Web Sugar Cookies or any other recipe on Hezzi-D’s Recipe Box please take a minute to rate the recipe and leave a comment letting me know how you liked it. I love hearing from you! You can FOLLOW ME on:
Spider Web Sugar Cookies
Equipment
Ingredients
- 2 1/2 cups flour
- 1 teaspoon baking powder
- 1/2 teaspoon salt
- 1 cup salted butter softened
- 1 cup granulated sugar
- 1 egg
- 1 teaspoon vanilla
- 1 recipe Royal Icing
Instructions
- In a medium mixing bowl combine the flour, baking powder, and salt.
- In the bowl of a stand mixer beat the butter until smooth. Gradually add in the sugar and continue mixing on medium until fluffy.
- Add in the egg and vanilla and beat until mixed well.
- Place the mixer on low and add in the flour mixture, mixing until just blended.
- Knead the dough into a ball and flatten into a disc shape. Cover with plastic wrap and refrigerate for at least an hour or overnight.
- Preheat the oven to 375 degrees.
- On a lightly floured surface roll the dough to 1/4 inch thick. Cut the cookies using a 3 inch circular cookie cutter. (I used a biscuit cutter.) Place the cookies on a baking sheet and bake for 6-8 minutes or until they no longer look wet on top.
- Remove from the oven and allow to cool for 2 minutes on the cookie sheet before removing to a wire rack. Cool completely.
- Make a large bowl of royal icing (See post for recipe). Place 3/4 of it in a large bowl and 1/4 of it in a small bowl.
- Tint the large bowl orange and the small bowl black. (I used Americolor Food Coloring)
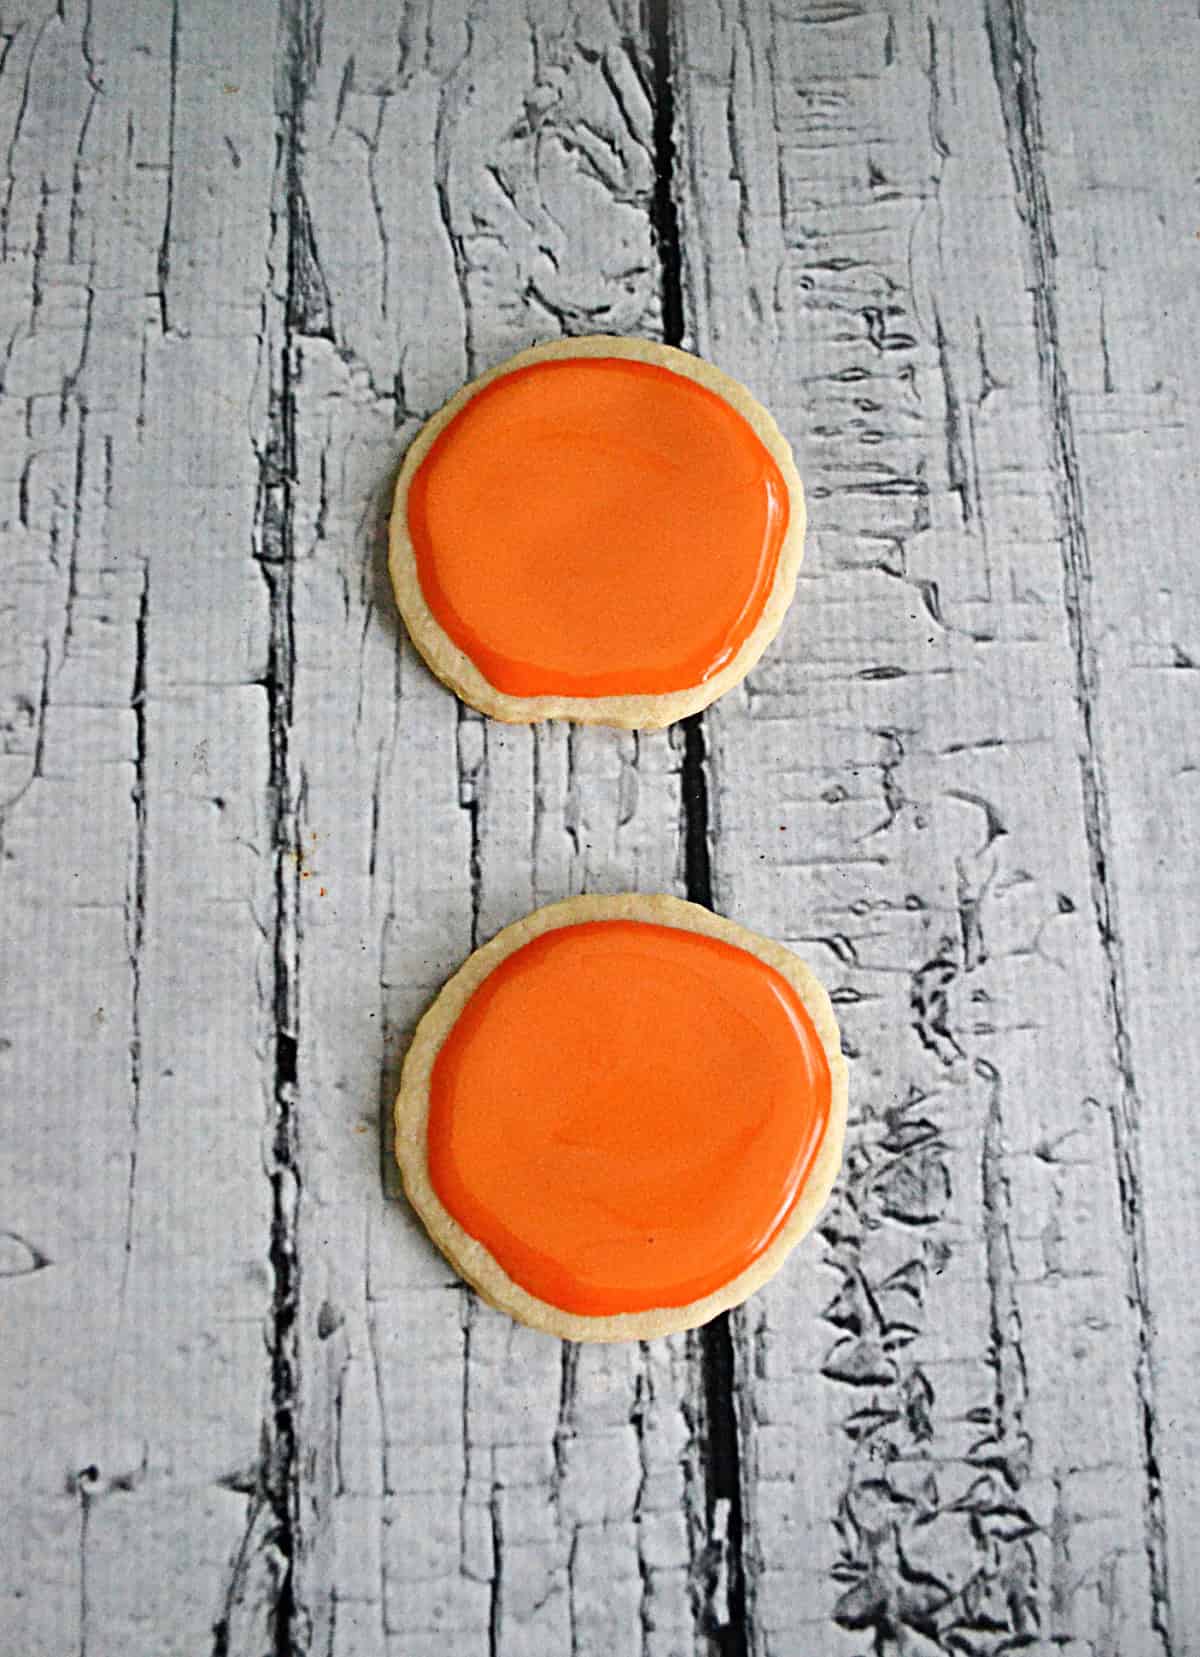
- Place half of the orange icing into a piping bag with a small tip. Pipe a large orange circle onto each cookie.
- Place the remaining orange icing back into a bowl and thin it slightly with water. Put the black icing int a piping back with a small tip.
- Working on 3 or 4 cookies at a time flood the cookie with orange icing. Immediately place a black dot in the center with 3 black circles around the dot. Immediately drag a toothpick through the black icing. You can choose to go from the inside to the outside only or you can go both ways for a different design.
- Allow to dry over night. Place in an air tight container and keep for up to 2 weeks.
Notes
I love the details to make these. I see why they look so amazing.
I really need to work on my royal icing skills. I would love my cookies to look as perfect as yours.
Thank you! I’ve been working on it for YEARS!
Those are really cute and if you changed the color to red and white and left off the spider you have Christmas cookies(:
I love the icing on these cookies – it truly carries the Halloween spirit!
Thanks for sharing,
Kristina
How creative. They look like they should be in a bakery!
Wow they look absolutely great. I can make these and spend some quality time with my kids.
Very detailed post–like that –seem EZ to do THANKS =)
Thanks for linking up at Pin It Wednesday Party.