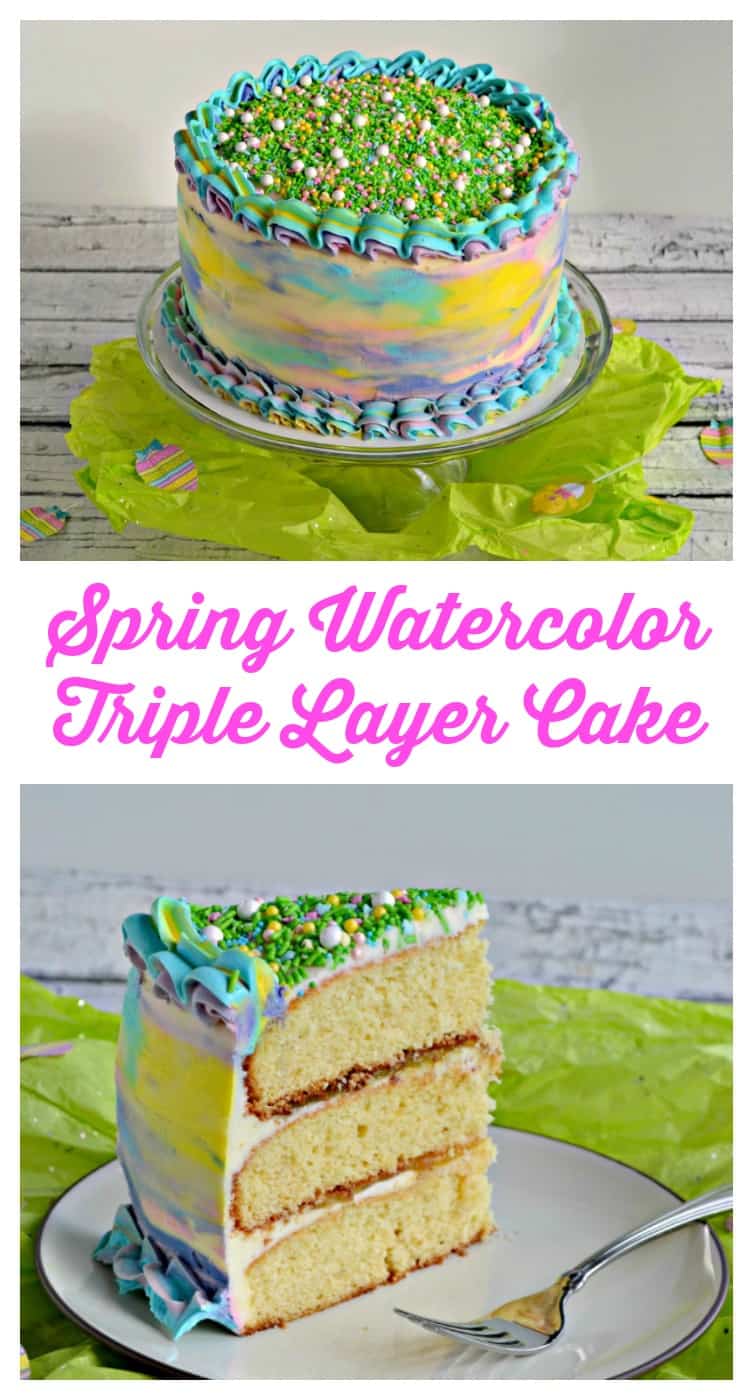
Spring Watercolor Triple Layer Cake
As an Amazon Associate, I earn from qualifying purchases. Read the full disclosure here.
This post is sponsored in conjunction with #SpringSweetsWeek. All opinions are mine alone.
Welcome to #SpringSweetsWeek 2020 hosted by Heather from Hezzi-D’s Books and Cooks! What better way to celebrate the warmer weather and flowers blooming than with food and a fun giveaway? 27 bloggers from around the country have come together to share over 100 sweet recipes perfect for spring! So stop thinking about cold and snow and get ready to enjoy the best spring sweets like cupcakes, cookies, brownies, pies, and even beverages!
Does anyone else have a baking bucket list a mile long? I feel like I’m constantly putting items on a list and whenever I actually make one I put two or three more on the list. This is because I like to watch cooking shows on the weekends whenever I blog. I get a lot of inspiration for my dishes and they are fun to watch.
One show I love watching is Kid’s Baking Championship. Last season they made these gorgeous watercolor cakes and I’ve been obsessed with them ever since. So when Spring Sweets Week came around I knew the first recipe I wanted to make was a Spring Watercolor Triple Layer Cake!
I planned to make this cake over a long weekend in case I needed the extra time but it turned out that I was able to make it in just two days. I spent the first day making the cake and the second day decorating it. Since I have a toddler at home my baking and decorating times are only an hour and a half per day while he naps so I was finished and done with this one in under 3 hours which isn’t too bad.
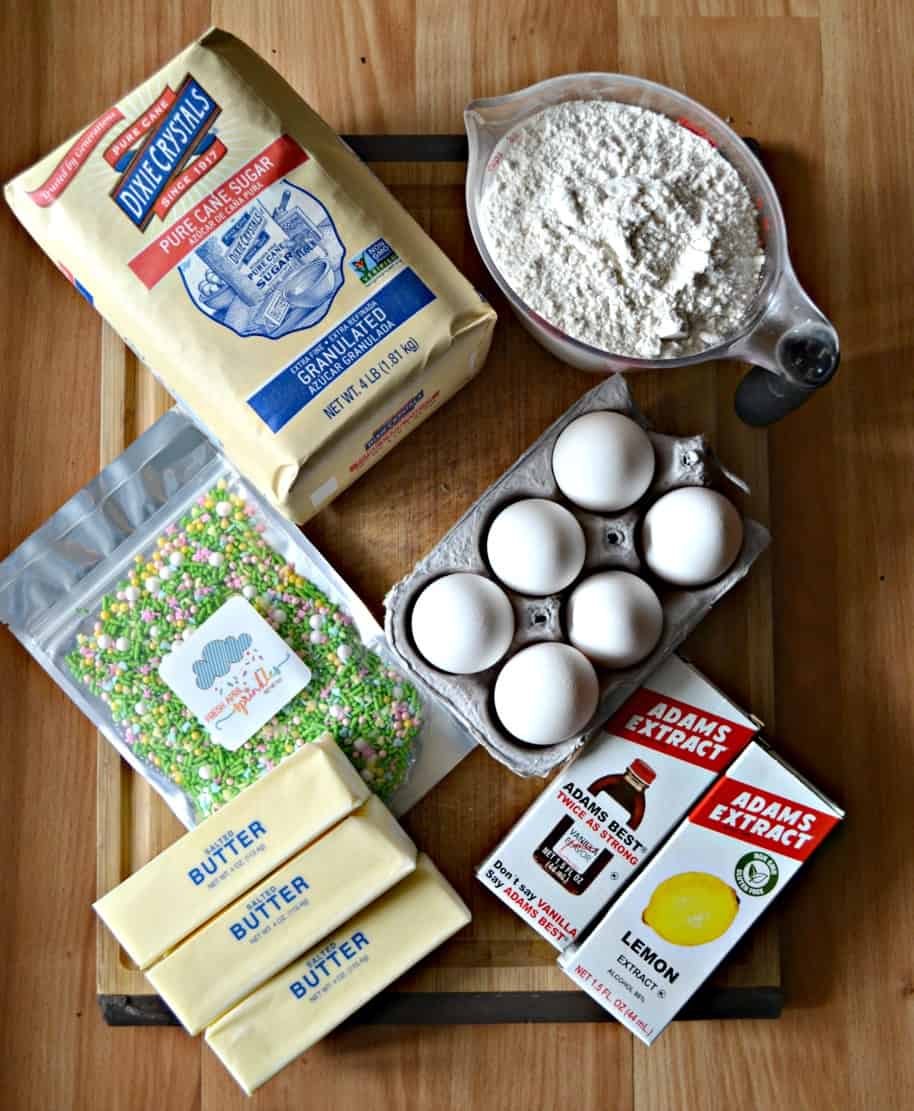
I started with the cake. Whenever I think spring I think of lemons so I made a lemon vanilla cake. I used Adams Best Vanilla Extract and lemon extract to give the cake its flavor. Then I used Dixie Crystals granulated sugar and plenty of butter. I divided the batter into three pans, each lined with a parchment paper circle, and baked them to perfection.
The next day I whipped up a batch of my vanilla buttercream frosting using Dixie Crystals powdered sugar, Adams Best Vanilla Extract, and tons of butter. It turned out fluffy and delicious. I left it all white to begin with.
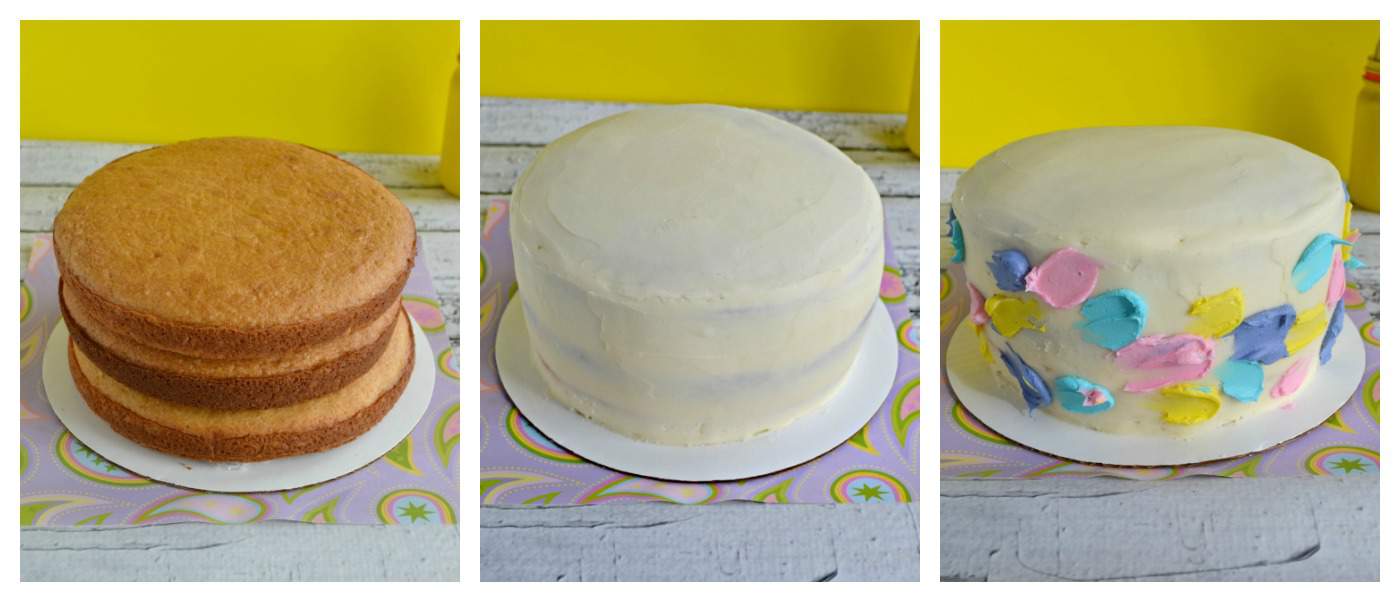
To make the cake I put a thin layer of buttercream frosting topped with lemon curd in between the layers then I put a crumb coat on the cake. I want to note that I never use a crumb coat on my cakes. I usually just frost them with enough frosting that I can smooth it out and it still looks good but in this case I needed the crumb coat so that I could produce the watercolor effect.
I froze the cake for 15 minutes and when it came out I put a thick layer of white buttercream frosting on top. I used a bench scraper that my brother bought me for Christmas to smooth out the frosting. In order to do this I dipped the scraper into hot water, dried it off, and used it to smooth the frosting. This seriously made the smoothest buttercream I’ve ever seen!
When that was done I froze the cake for an additional 10 minutes while I colored the frosting. I had about a cup and a half left so I put a little more than a third of a cup into 4 bowls. I tinted one baby pink, one baby blue, one light purple, and one yellow. I used white food coloring to achieve the pastel look.
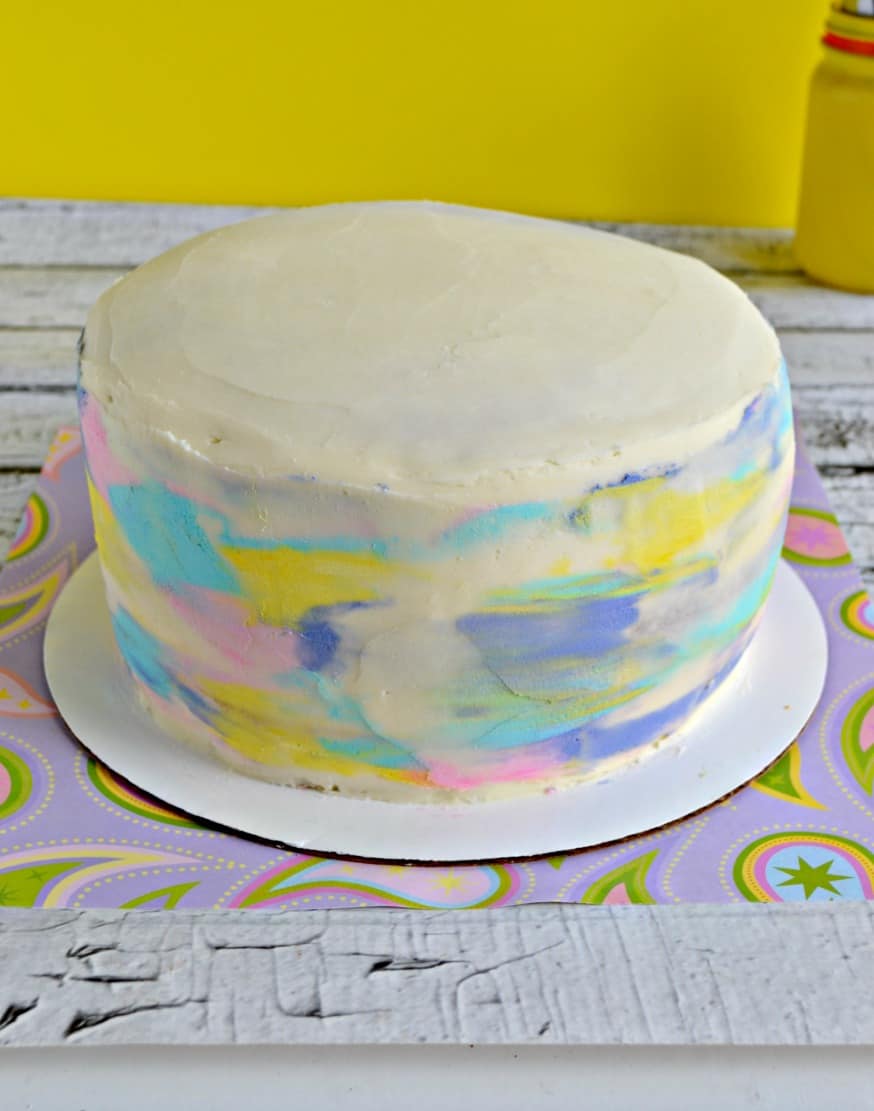
To get the watercolor effect I used a small spatula and spread 10 one inch smears of each color frosting on the cake. Then I grabbed my bench scraper, dipped it in the hot water, and smoothed it out around the cake. The effect is a gorgeous mix of the pastel colors! I kept at it until it was smooth and looked the way I wanted it to.
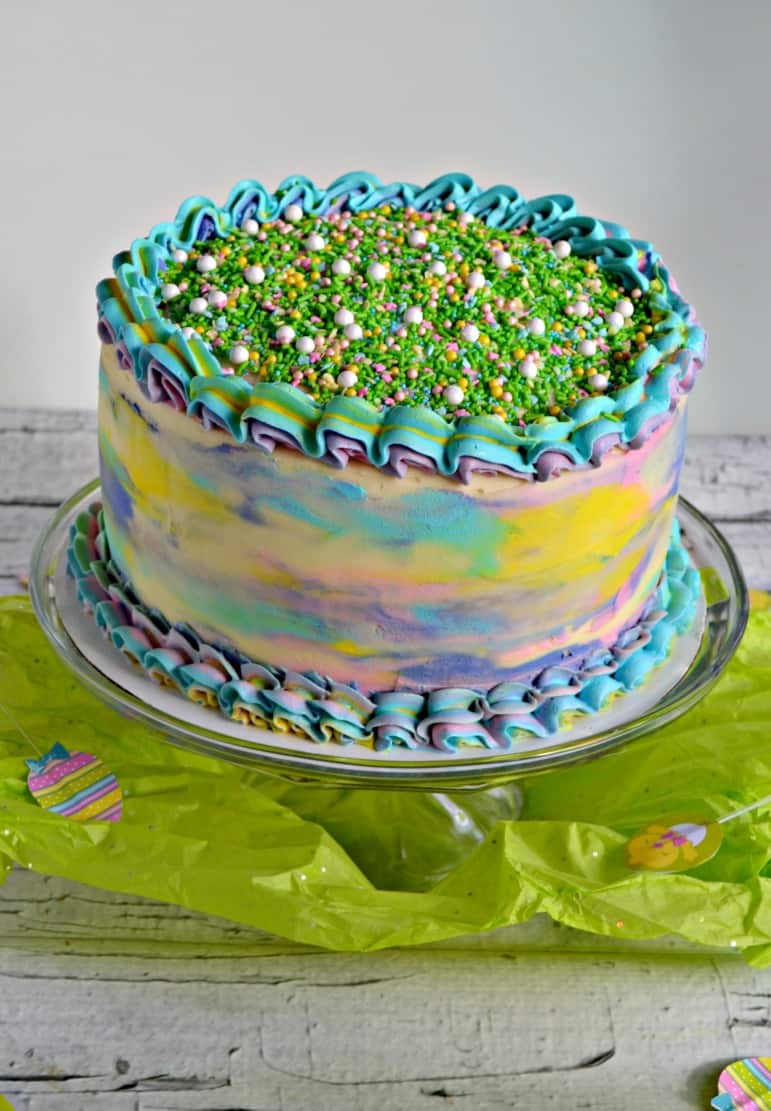
To finish up I grabbed a pastry bag and spooned the remainder of each of the 4 colored frostings into the bags and squeezed until I got multiple colors. I piped a bottom border and then a border around the top edge. All that was missing now was to decorate the top!

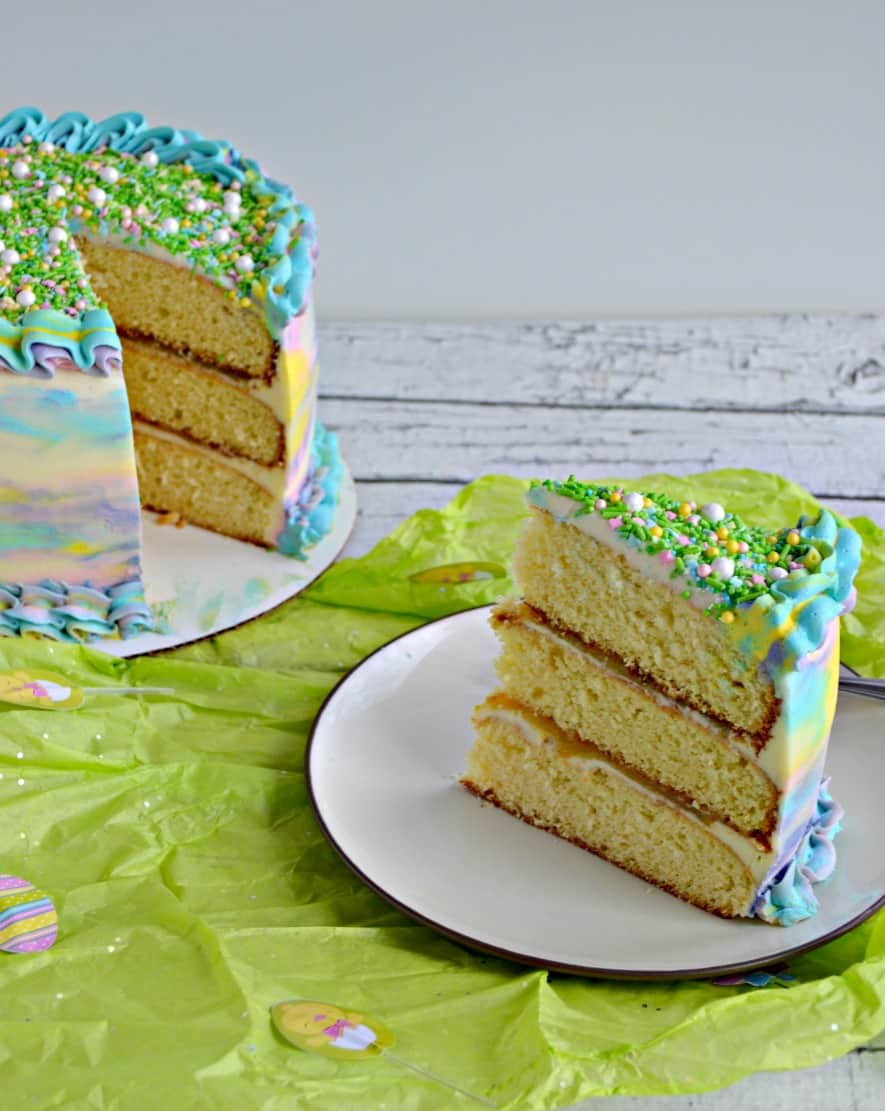
Since the sides are so colorful and busy I wanted to go with a simple, but festive, decoration. That came in the form of sprinkles. I used the Spring It On Sprinkle Blend from Fresh April Sprinkles. The sprinkles look like Easter grass dotted with pastel Easter eggs. It really completed the look I was going for.
This cake may be my favorite cake ever! It was huge but the layers were perfect. I feel like the decorations scream spring and it was easier to make than I thought it would be. I sliced a piece for my husband and I and we both agreed this was one of my best tasting cakes as well. We took pieces to a few of our friends as well and it went over so well that I think I may make it again in time for Easter!
Pro Tips & Substitutions:
- I place a parchment circle on the bottom of every cake pan I use. This way the cake never sticks to the bottom! You may have to cut the circle to size but in the long run it will save every single cake you bake.
- If you decorate cakes frequently do yourself a favor and buy a bench scraper. They only cost a few dollars and they really make buttercream look smooth!
- If you don’t have any piping bags on hand you can totally use a zip top baggie! Simply place the frosting in the baggie, zip the top, and cut off the end to pipe onto the cake. You can even fit a piping tip in the corner that you cut off!
- You can customize this cake for any holiday or season by simply changing up the colors. Looking for Christmas? Use red, green, and gold frosting. Want a Halloween cake? Try green, purple, orange, and black frosting. Fourth of July cake? Red, white, and blue frosting will be a hit.
Spring Watercolor Triple Layer Cake #SpringSweetsWeek
Equipment
Ingredients
For the cake:
- 3 3/4 c. flour
- 1 t. baking soda
- 1 1/2 t. baking powder
- 1 t. salt
- 1 1/2 c. 3 sticks butter, softened
- 2 1/4 c. sugar
- 6 eggs
- 1 t. Adams Extract Lemon Extract
- 2 t. Adams Best Vanilla Flavor
- 1 1/4 c. milk
For the frosting:
- 4 sticks butter softened
- 6 c. powdered sugar
- 1 T. Adams Best Vanilla Flavor
- 3 T. milk
For assembling and decorating:
- 1 c. lemon curd
- 2 oz. Easter Sprinkles
- pink purple, blue, and yellow food coloring
- white food coloring optional
Instructions
- Preheat the oven to 350 degrees. Spray three 8" round cake pans and place a parchment circle at the bottom of the pan. Set aside.
- In a medium bowl combine the flour, baking soda, baking powder, and salt. Mix well and set aside.
- In a large bowl cream together the butter and sugar until it is smooth. Add in the eggs, vanilla extract, and lemon extract and mix well.
- Add half the flour mixture to the butter mixture and mix until combined.
- Add in the milk and mix well. Add the remaining flour and mix until just combined.
- Divide the batter between the three pans. I had about 2 cups of batter in each pan. Bake for 35 minutes.
- Remove from oven and allow to cool 10 or 15 minutes. Run a butter knife around the edge of the cake and remove from pan. Cool completely on a wire rack.
- To make the frosting place the butter in a large bowl. Beat with a mixer on medium high speed until smooth.
- Add in the powdered sugar a half cup at a time.
- Add in the vanilla extract and the milk and mix well. Add additional powdered sugar if needed.
- To assemble the cake place one cake on a cake round. Spread 1/2 cup of buttercream frosting on the cake layer. Pipe a thin boarder around the outside of the layer then fill with 1/2 cup of lemon curd. Top with the second layer.
- Spread 1/2 cup of buttercream frosting on the second cake layer. Pipe a thin boarder around the outside of the layer then fill with 1/2 cup of lemon curd. Top with the third layer.
- Put a crumb coating of buttercream frosting on the cake and freeze it for 15 minutes.
- Remove from freezer and cover with frosting.
- Dip a bench scraper in hot water, dry it off, and smooth the frosting around the edges and top. Dip the scraper in water as needed.
- Once the buttercream is smooth freeze for 10 minutes.
- Meanwhile, divide remaining frosting beteen 4 small bowls. Color one pink, one blue, one purple, and one yellow. Add white food coloring to make the colors more pastel.
- Remove the cake from the freeze and place 10 one inch smears of each color frosting randomly around the outside of the cake.
- Dip a bench scraper in hot water, dry it off, and smooth the frosting colors around the outside of the cake while smearing them together for a watercolor effect. Pick the bench scraper up and do another full spin of the cake as needed until it looks how you want it to look.
- Place the remaining colored frosting in a piping bag trying to put one color on each side of the bag so it will come out swirled. You want a star tip in the piping bag.
- Pipe a border around the bottom of the cake and another around the top edge of the cake.
- To finish the cake place a little water on your fingers and spread it on top of the cake to make the frosting sticky.
- Quickly pour the Easter sprinkles on the top of the cake until it is covered.
- Cut into slices and enjoy!
Notes
Monday #SpringSweetsWeek Recipes
- Auntie Ann’s Italian Cookies by Jolene’s Recipe Journal
- Butter Pecan Macaron by A Kitchen Hoor’s Adventures
- Butterscotch Pie with Pecan Crust by Art of Natural Living
- Carrot Cake Cheesecake Bars by Cookaholic Wife
- Carrot Cake Pecan Pie by The Spiffy Cookie
- Coconut Pineapple Bread by Family Around the Table
- Coffee Peanut Butter Sweet Rolls by Pastry Chef Online
- Coffee Pudding Cake by That Recipe
- Hummingbird Bundt Cake with Cream Cheese Glaze by Cheese Curd In Paradise
- Lemon and Raspberry Mascarpone Cupcakes by Palatable Pastime
- Lemon Jelly Roll by A Day in the Life on the Farm
- Lemony Baked Doughnuts by Karen’s Kitchen Stories
- Mint Chocolate Quick Bread by Cindy’s Recipes and Writings
- Orange Posset by Shockingly Delicious
- Pecan Pie Cheesecake Bars by Sweet Beginnings
- Pink Lemonade Rice Krispie Treats by Blogghetti
That watercolor look looks gorgeous! So bright, colorful, and full of spring!
I have been thinking about how beautiful this cake is from the Facebook page. So happy you posted it!
Lemon cake and vanilla frosting sound like an incredible combo to me! The way you decorated the cake is a work of art!
Cake decoration is my total nemesis! You are so skilled! Gorgeous cake!
Such a pretty spring cake…the colors are amazing! And the sprinkles just make it so adorable!
That cake is so pretty!!! I love how use meshed all the colors together on the side
I love the colors on this cake. The blend is perfect for spring!
GORGEOUS cake! I love the watercolor effect and those pretty spring colors.
Thanks so much for hosting this year’s Spring Sweets Week! As always, it’s been a blast. And after just one day, I have a new list of recipes to make a mile long.
Stay healthy my friend!
Thanks Liz! I just loved making this cake. I’m glad you are participating in this year’s event!
This cake would be the centerpiece of any Spring occasion! Everything about it’s lovely!
I love this cake so much! It’s so pretty and so springy!!
This looks lovely and the combination of the lemon and vanilla sounds fabulous. Yeah for getting it done during naptime, that isn’t always easy.
You’ve got that right! Thank you for your kind words.
What a great cake to start the week off with! I love it. I wish I could decorate cakes like this!
You should try! Decorating is easier then you think!