French Country Bread with a Sourdough Starter for Daring Bakers
As an Amazon Associate, I earn from qualifying purchases. Read the full disclosure here.
I’ve never in my life made sourdough bread. It’s always seemed like way to much work having to create and nurture a starter for almost a week before baking the actual bread. However, after hearing all the wonderful things people have made from their sourdough starters I was excited to make my own! I had no idea that I could make wheat bread, sourdough bread, pretzels, challah, and a million other things from the sourdough starter.

Our Daring Bakers Host for December 2011 was Jessica of My Recipe Project and she showed us how fun it is to create Sour Dough bread in our own kitchens! She provided us with Sour Dough recipes from Bread Matters by AndrewWhitley as well as delicious recipes to use our Sour Dough bread in from Tonia George’s Things on Toast and Canteen’s Great British Food!
It takes a little work at the beginning but once you have your starter going, it only takes a day or two to make bread with that same stater at a later date. I was shocked by the number of people that have had the same starter for years! Who knew?

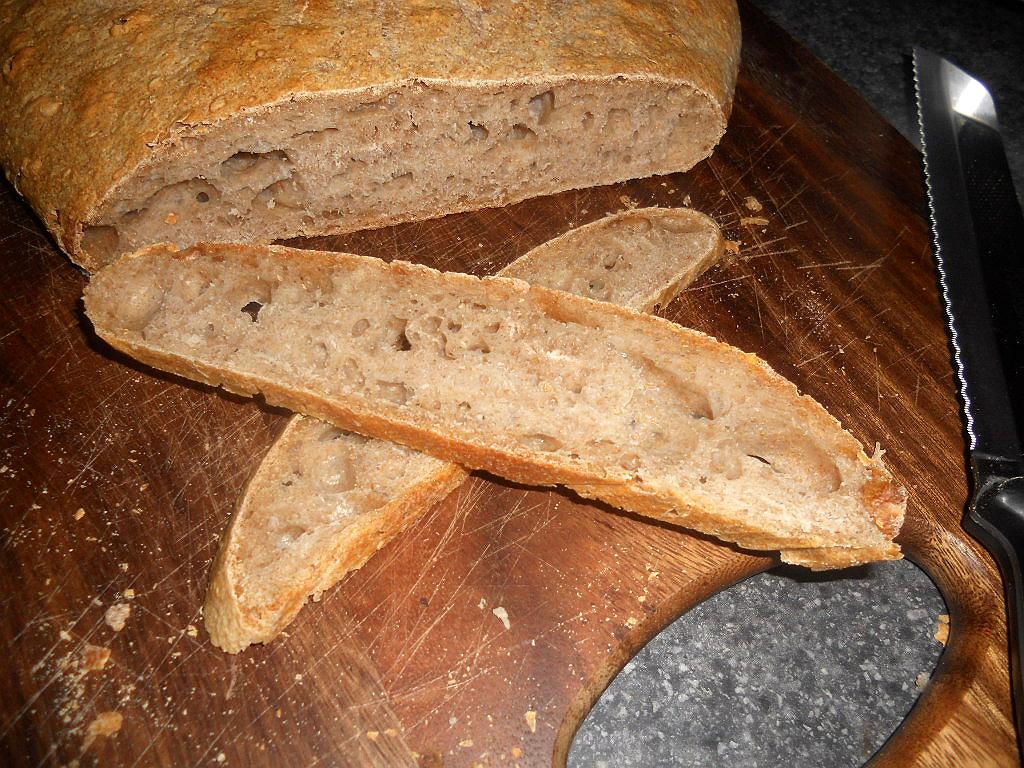
Although this bread took a long time to make, it turned out really well. The flour was a combination of stone ground wheat and all purpose white. The taste and color reminded me of whole grain white bread. The bread was slightly sour but not too much. I’ve been told that the longer my starter sits, the more sour my bread will be. The sourdough bread was golden brown and crunchy on the outside by really soft inside with a nice crumb. We used ours to make toast, bruschetta, and for sandwiches. I can’t wait to try a few other new recipes using my starter!
French Country Bread (and a Sourdough Starter) (from Bread Matters by Andrew Whitley)
Starter Day 1:
4 1/2 T. stoneground wheat flour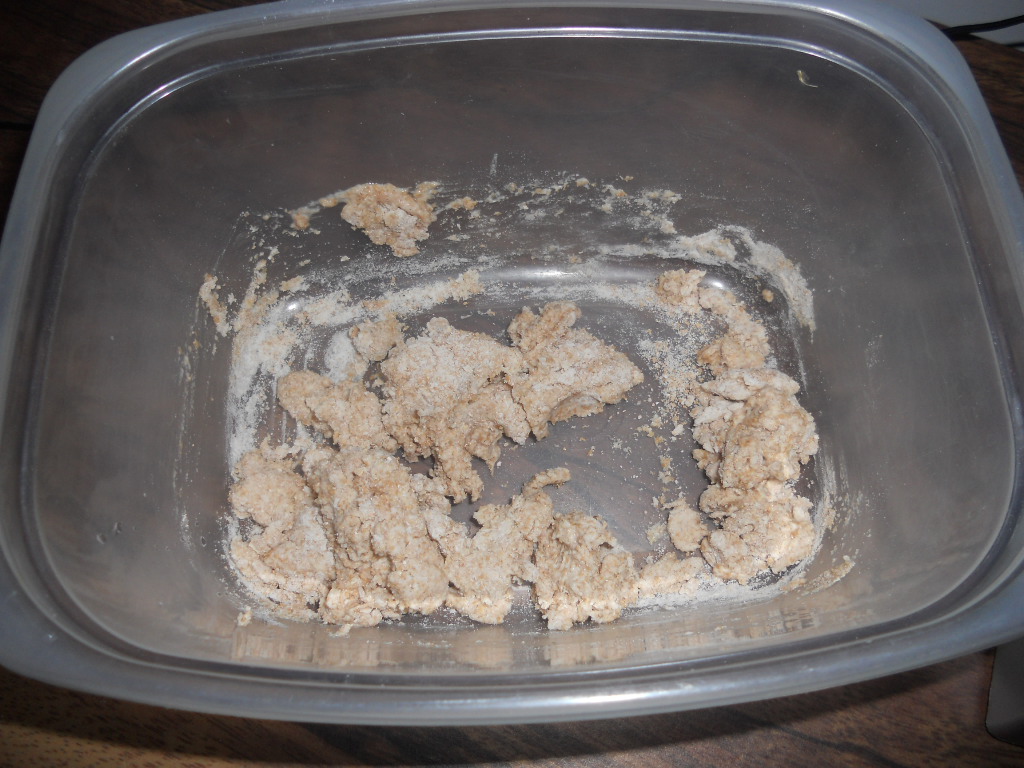 3 T. water
1. In a plastic container, mix the flour and water together, creating a paste.
2. Set the lid on gently and cover with a plastic bag to prevent messes. Set somewhere warm.
Starter Day 2:
4 1/2 T. stoneground wheat flour
3 T. water
1. Stir the flour and water into the mixture from the first day. Cover with the lid, put in the plastic bag, and return to the warm area.
Starter Day 3:
4 1/2 T. stoneground wheat flour
4 t. water
1. Stir the water and flour into the mixture from day 2. Cover with lid, put in the plastic bag, and return to the warm area.
Starter Day 4:
3/4 c. all purpose flour
1/2 c. (less 4 teaspoons) water
1. Stir the flour and water into the mixture from day 3. Cover with lid, put in the plastic bag, and return to the warm area. At this point the flour should bubble and smell yeasty. If not, repeat this process for one more day.
French Country Bread-Stage 1: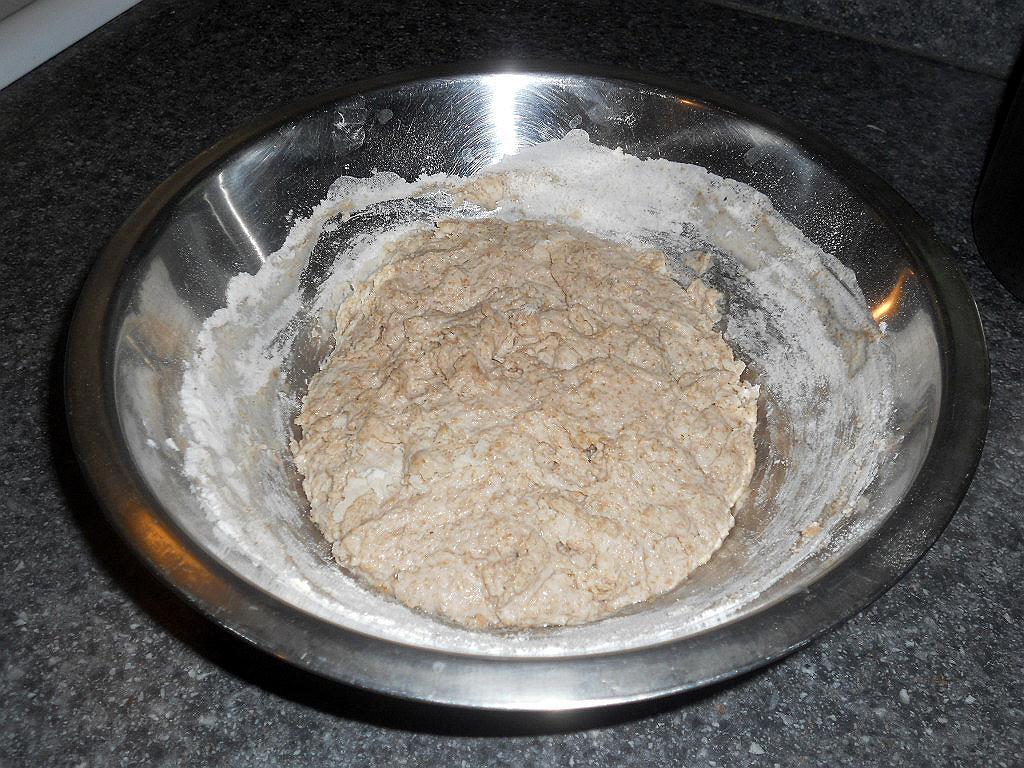 1 c. starter
6 T. stoneground wheat flour
1 c. all purpose flour
1/2 c. water
1. Mix everything into a sloppy dough. The dough will be stiff. Cover and set aside for 4 hours. At this point it should be bubbly and expanded.
French Country Bread-The Final Stage:
3/4 c. stoneground wheat flour
2 c. all purpose flour
1 t. sea salt
1 1/4 c. water
1 3/4 c. wheat production leaven that you made in stage 1. (Keep the remaining leaven as your starter for next time)
1. Mix together the wheat flour, all purpose flour, and water. This will make a soft dough.
2. Knead on an unfloured surface for 8-10 minutes. If needed, get your fingerprints wet to help knead the dough until it is smoother and more elastic.
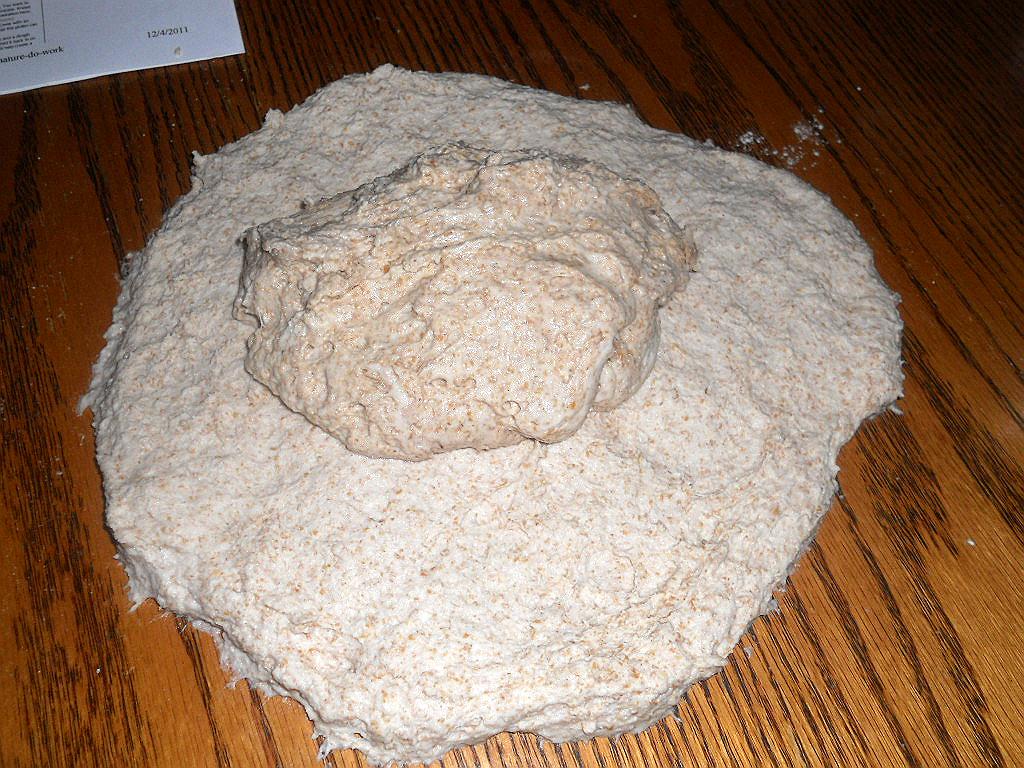 3. Smooth the dough into a circle then scoop the production leaven into the middle of the dough. Fold the edges of the dough around the leaven and need for several minutes or until the leaven is incorporated into the dough.
4. Spread some water onto a clean bit of the kitchen table and lay the dough on top. Cover with an upturned bowl, lining the rim of the bowl with a bit of water. Leave for an hour so that the gluten can develop and the yeasts can begin to aerate the dough.
5. After an hour remove the bowl and stretch the dough. Using wet hands knead the dough and fold it on top of itself several times.
 6. Heavily flour a proofing basket with whole wheat flour. (I did not have a proofing basket so I simply floured a bowl). Place your dough seem side up in the basket. Put the basket in a plastic bag and set in a warm place for 5 hours, or until it has expanded.
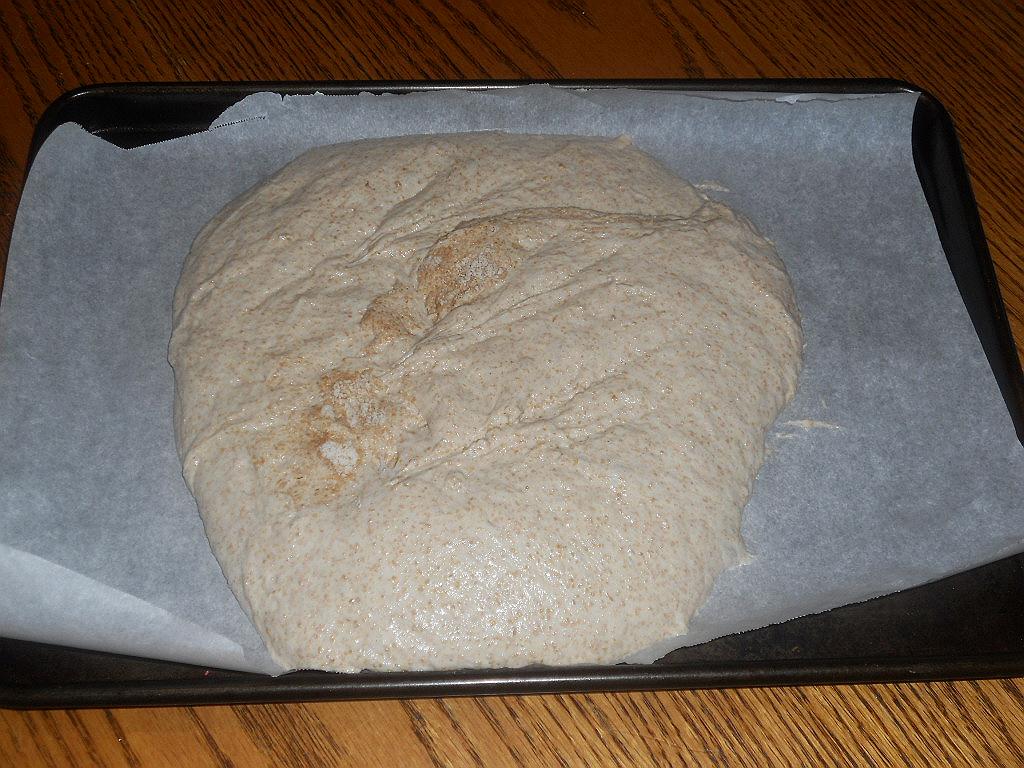
7. Preheat the oven to 425 degrees. Line a baking sheet with parchment paper. Carefully invert the dough onto the baking sheet and remove the basket/bowl. Make 2-3 cuts in the top of the bread and place in the oven. Bake for 40-50 minutes. After baking for 10 minutes reduce the oven temperature to 400 degrees.
8. Cool on a wire rack.