Easy Witch Craft : Crafts for Kids!
As an Amazon Associate, I earn from qualifying purchases. Read the full disclosure here.
All you need is some paper, glue, and googly eyes to make these fun witch faces in time for Halloween! This is a great project for kids ages 2-10 as they can make it as easy or as detailed as they would like!
As most of you know I’m an elementary school teacher and I work with kids in grades K-5. While 95% of the time I’m doing academic work with my students there are a few times when I like to do fun holiday projects with them.
Since Halloween is coming I pulled out my folder of crafts to find one to work on. I came across this Easy Witch Craft and took home the pattern so that I could make one with my four year old son.
This is one of those crafts I do almost every year because it’s easy and the kids can get really creative with it. While I usually just do the basic witch some years we add in glitter or stickers to the mix.

Materials:
- paper plate
- crayons
- green, black, and purple construction paper
- scissors
- glue
- googly eyes
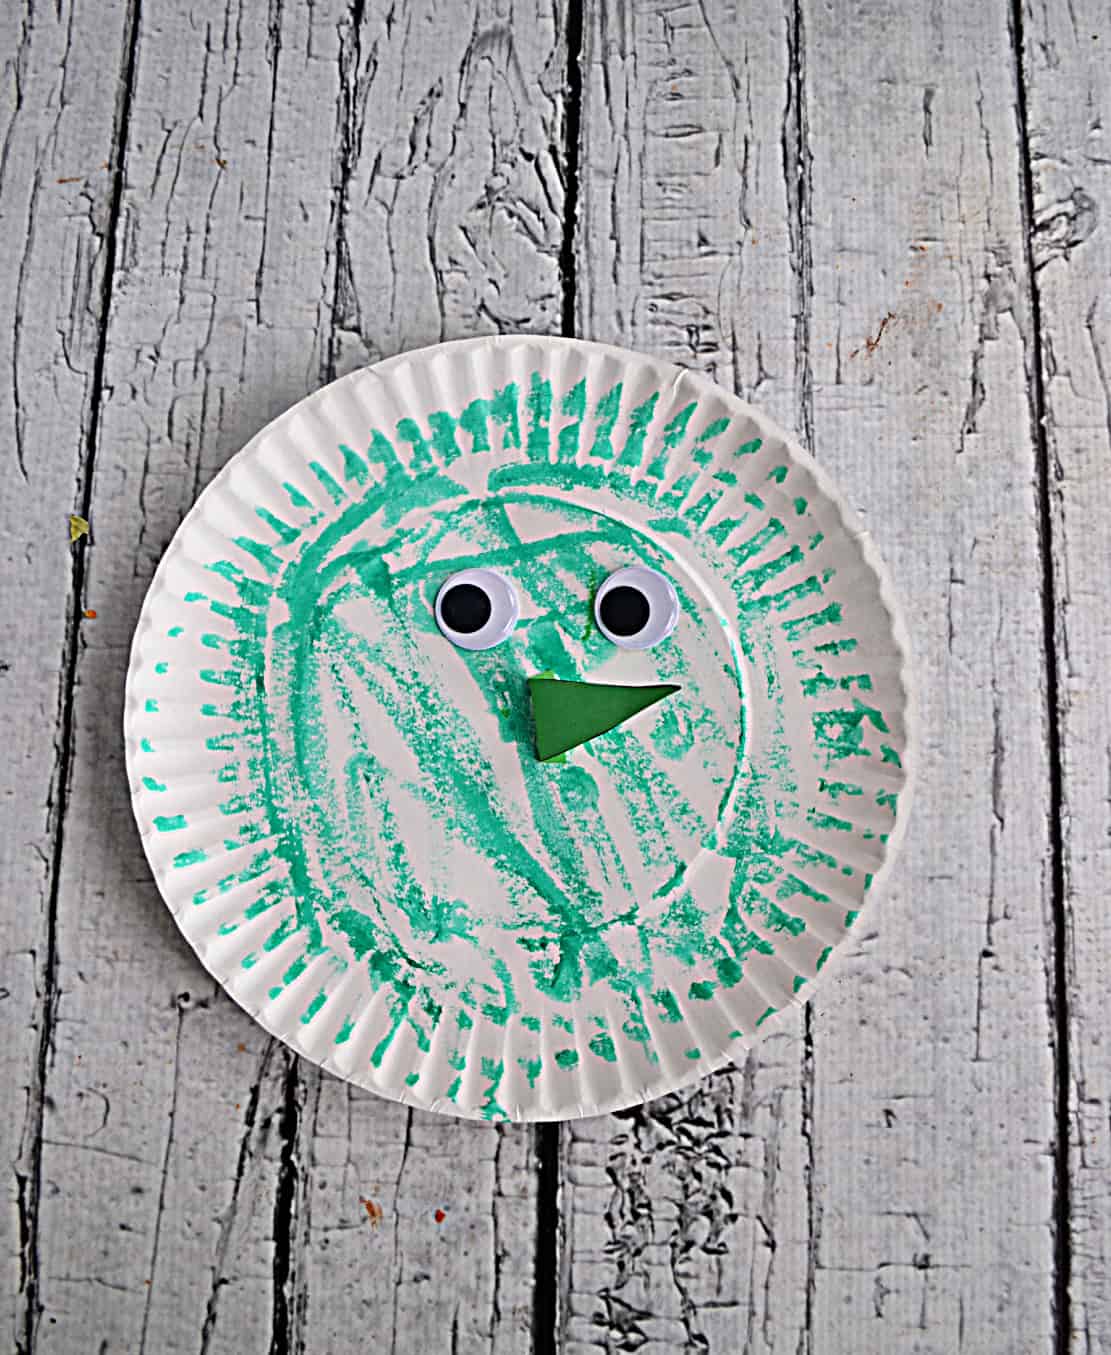
- Color the paper plate whatever color you’d like to make your witch. We typically go with green but go ahead and be creative.
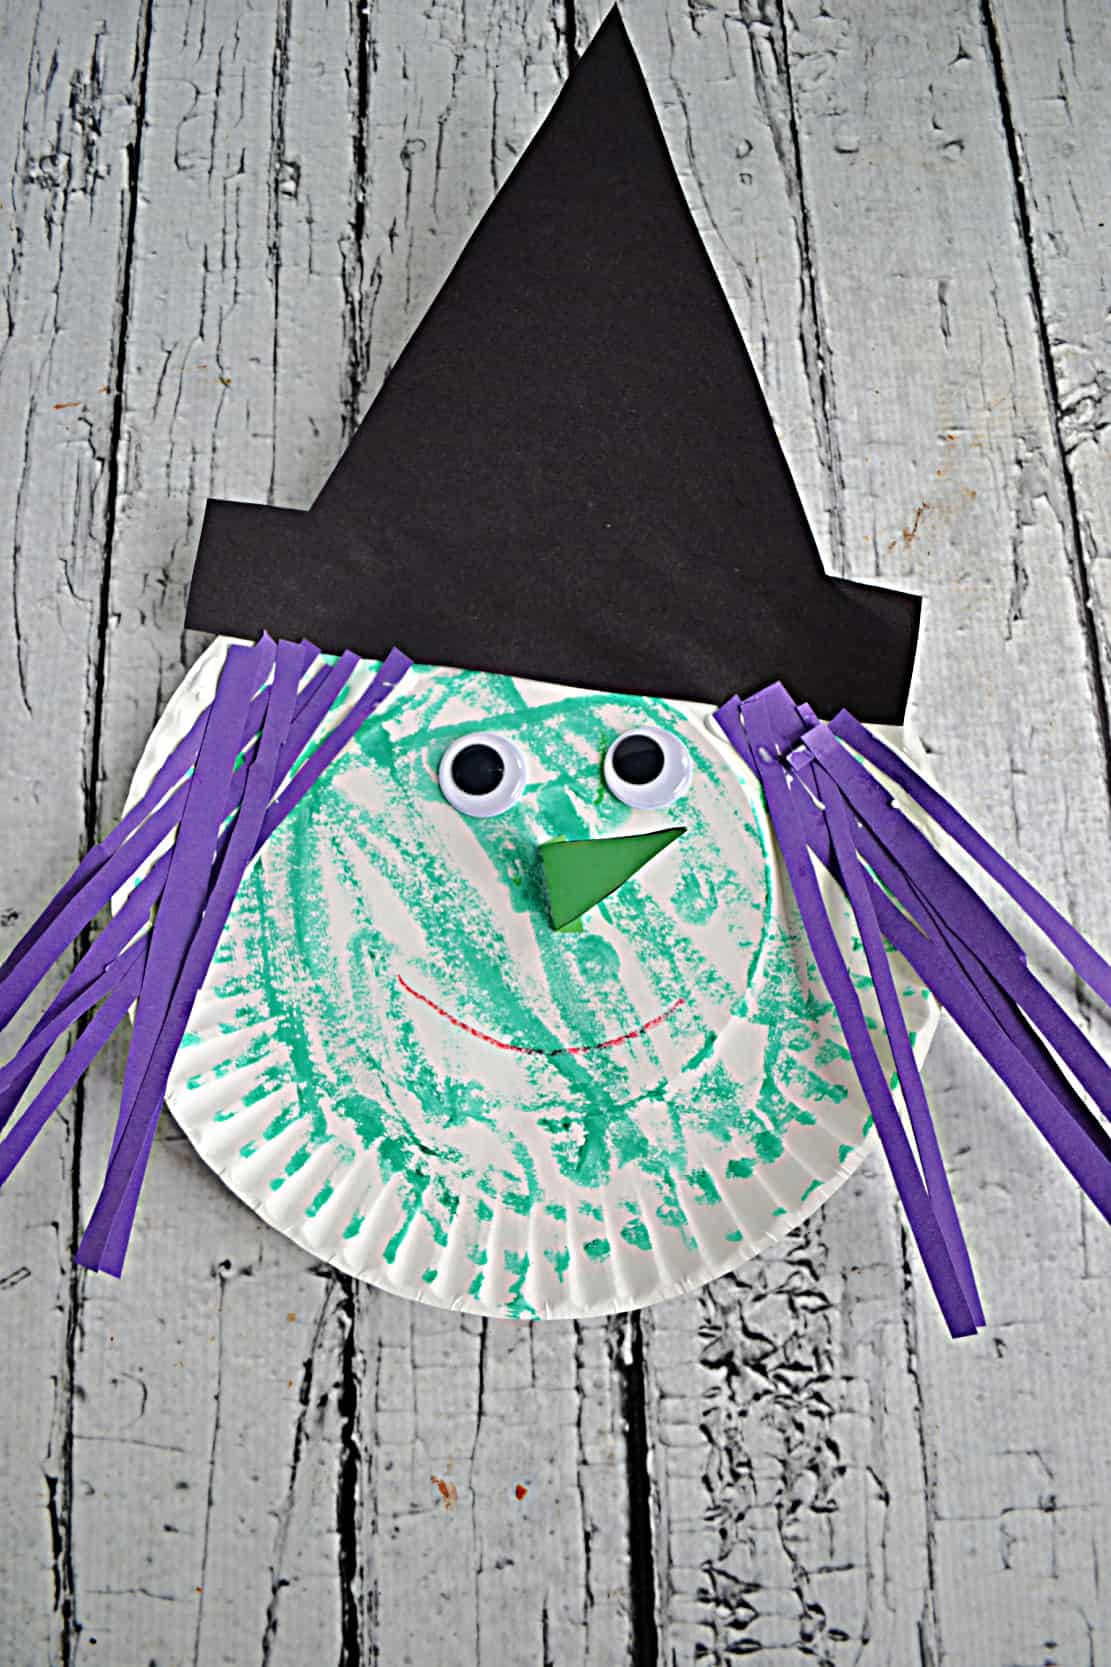
- Decide what color you want to make the hair. I usually have the kids use purple but if they want to go with red, black, or orange I let them. Cut this colored paper into thin 1/4 inch strips. Set aside.
- Cut a long, pointy nose from the green paper. Set aside.
- Cut a witches hat from the black paper. I let the older kids cut theirs in whatever shape they want. I usually have two patterns for the younger kids to trace and cut.
- Once everything is cut out take the thicker end of the nose and fold it 1/4 inch. Put glue on the folded piece and glue it in the center of the paper plate to make a 3D nose.
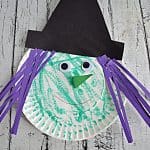
- Place glue on the rim of the hat and stick it to the top of the paper plate.
- Glue the googly eyes onto the paper plate to make the eyes.
- Finally, glue about 10 strips of “hair” onto each side of the witches head to make the hair.
- Kids can decorate the hat with stickers, glitter, and gel pens, and color details on the face.
- Allow to dry and then hang it up!
Since I mostly work with the older kids they can do most of this project on their own. While I prefer glue sticks for most craft projects I feel like this one works best with liquid glue.
If you have very young children you can trace the pattern for them and help them cut or else just cut everything out and have them glue the pieces together and decorate the witch.
Can I use different colored paper?
Of course! It’s your witch, make it whatever color you want too. I always start my students out with purple, green, and black but I have other colors on hand if they want something else.
Is this a messy project?
Not at all which is why it is great for younger children! The glue is the only real mess so I just keep wipes handy to wipe messy hands or the table before the glue dries.
What else can I use to decorate the witch?
Gel pens are great for the black hat. If you are into glitter (I am not because it’s a mess!) that is fun on the hat as well. Star, spider, ghost, or cat stickers are fun to stick on. You can also have them cut out shapes and glue them to the hate or face as well.
My son doesn’t love crafts but he does love Halloween and he was totally into making this witch. He scribbled green all over the paper plate and wanted to get to the cutting.
I ended up tracing the nose and hat pattern for him because he isn’t great with a pencil. He did the cutting himself and I helped to hold the paper. I also cut the hair strips because that would be a lot of cutting for him.
In the end we didn’t do any additional decorations but he was proud of his witch and I thought it looked pretty good. We hung it on the refrigerator but I’m thinking about putting a hanger on it and hanging it on the front door instead of a wreath. I think he would get a big kick out of that.

More Halloween Ideas for Kids:
- 15 Fun Foods for Toddlers and Preschoolers for Halloween
- 15 Easy Crafts for Toddlers and Preschoolers for Halloween
- Easy Monster Mouths (snack)
- Silly Pumpkin Cupcakes
- Candy Corn Parfaits
Easy Witch Craft
Materials
- 1 paper plate
- crayons
- 1 sheet green construction paper
- 1 sheet black construction paper
- 1 sheet purple construction paper
- scissors
- glue
- 2 googly eyes
Instructions
- 1. Color the paper plate to make the face of the witch. We typically go with green but go ahead and be creative.
- 2. Cut the purple paper into thin ¼ inch strips. Set aside.
- 3. Cut a long, pointy nose from the green paper. Set aside.
- 4. Cut a witches hat from the black paper. If you have a younger child you can draw the hat or have them trace one and then have them cut it out.
- 5. Once everything is cut out take the thicker end of the nose and fold
it ¼ inch from the end. Put glue on the folded piece and glue it in the center of the paper plate to make a 3D nose. - 6. Place glue on the rim of the hat and stick it to the top of the paper plate.
- 7. Glue the googly eyes onto the paper plate to make the eyes.
- 8. Finally, glue about 10 strips of "hair" onto each side of the witches head to make the hair.
- 9. Kids can decorate the hat with stickers, glitter, and gel pens, and color details on the face.
- 10. Allow to dry and then hang it up!
Notes