Sourdough Pizza Crust
As an Amazon Associate, I earn from qualifying purchases. Read the full disclosure here.
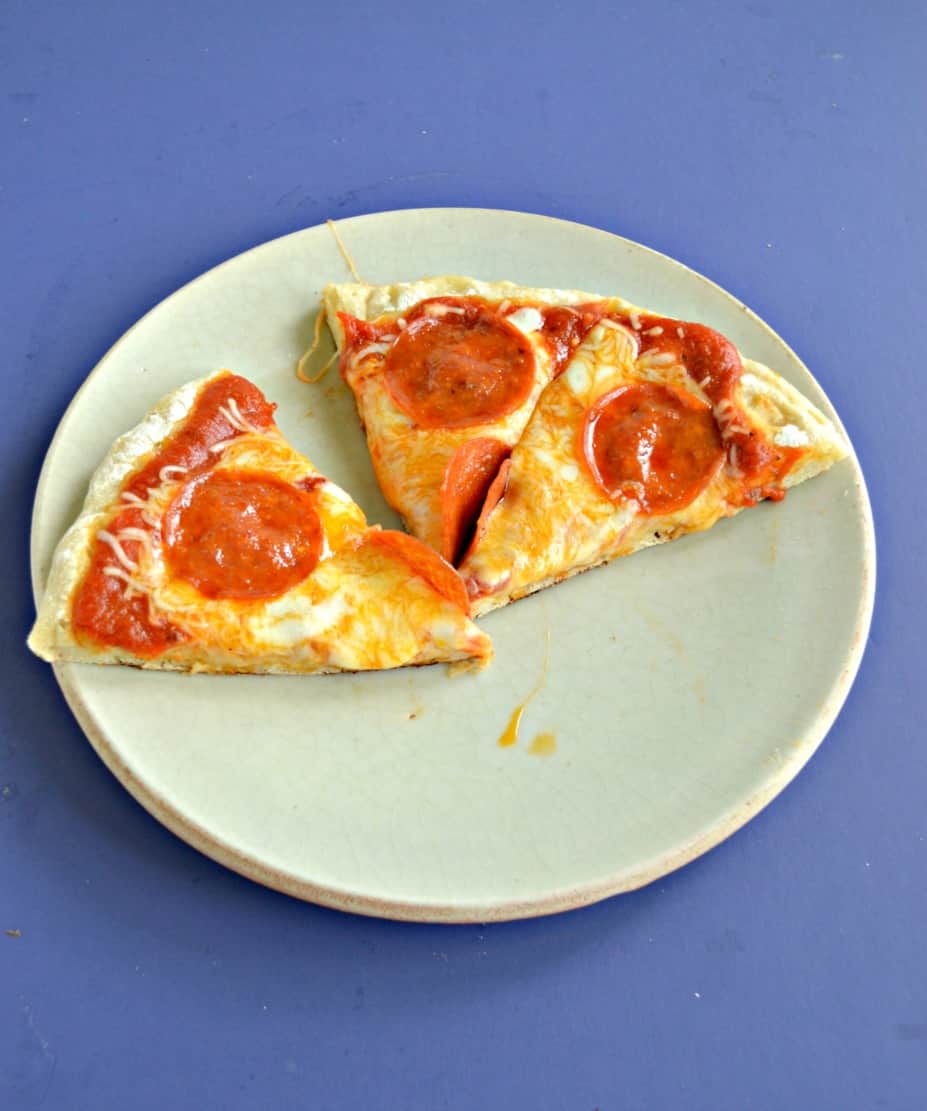
Sourdough pizza is made with sourdough starter and makes four delicious pizzas that are cooked in a skillet and then finished off under the broiler.
I’m always looking for ways to use my sourdough starter. I hate to throw any part of Virgil Flours away so if I can use the discard in a recipe I’m all for it. Plus, let’s be honest, sourdough recipes are delicious.
I was looking for a pizza recipe but so many of them made just one big pizza that was totally cooked in the oven and it’s too hot for that right now. So when I found a recipe that made multiple individual sized pizzas that were mostly cooked on the stove top then just finished under the broiler.
This recipe takes more than one day so make sure you have plenty of time. The good news is that while it makes four individual pizzas, you can freeze the crusts for up to three months so make a few now and save a few for later.
I also want to note that this dough is pretty stick and can be hard to work with so don’t feel bad adding additional flour during the last step because the dough will need it.
The night before you want the pizza mix all the ingredients together in a bowl and let the dough ferment overnight. In the morning you will stretch and fold the dough multiple times then put it in the refrigerator until you are ready to make pizza.

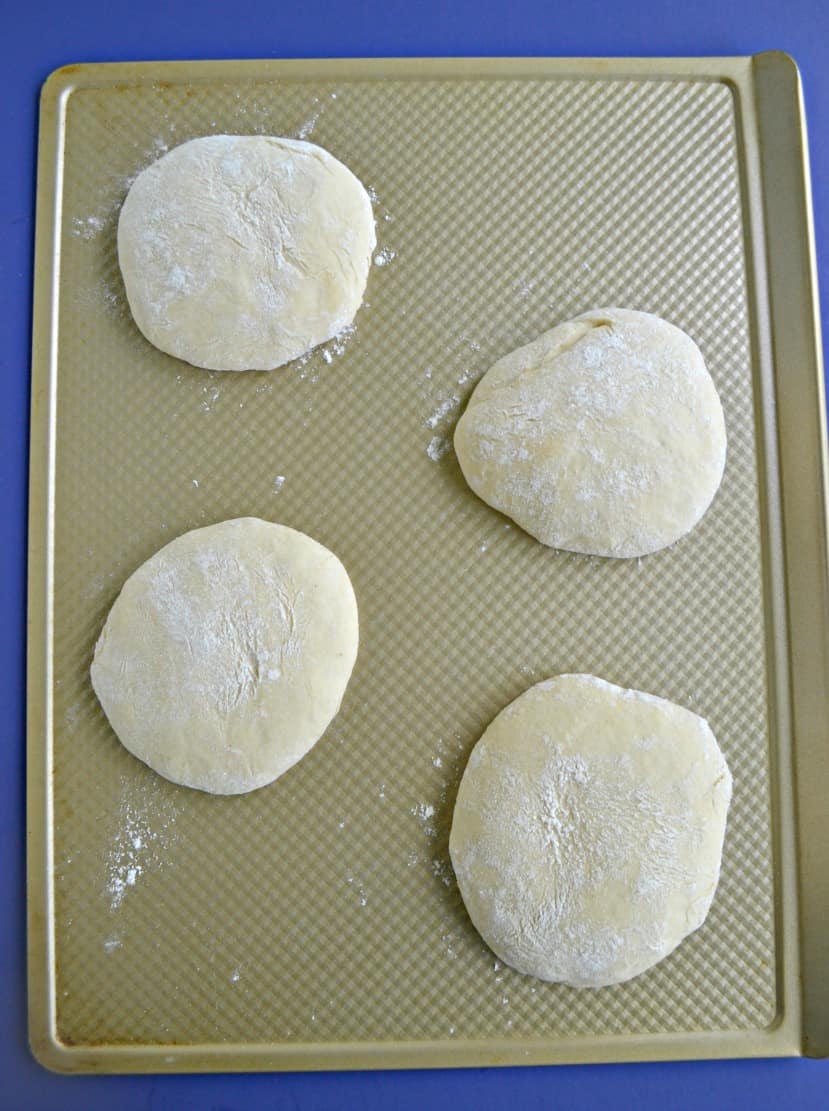
An hour before it’s time to make pizza you’ll take it out of the refrigerator and allow it to rest before dividing it into four pieces and letting it rest again. Then you are ready to make the pizzas! When I say that I feel like Cookie Monster and Gonger getting ready to make a pizza in their food truck.
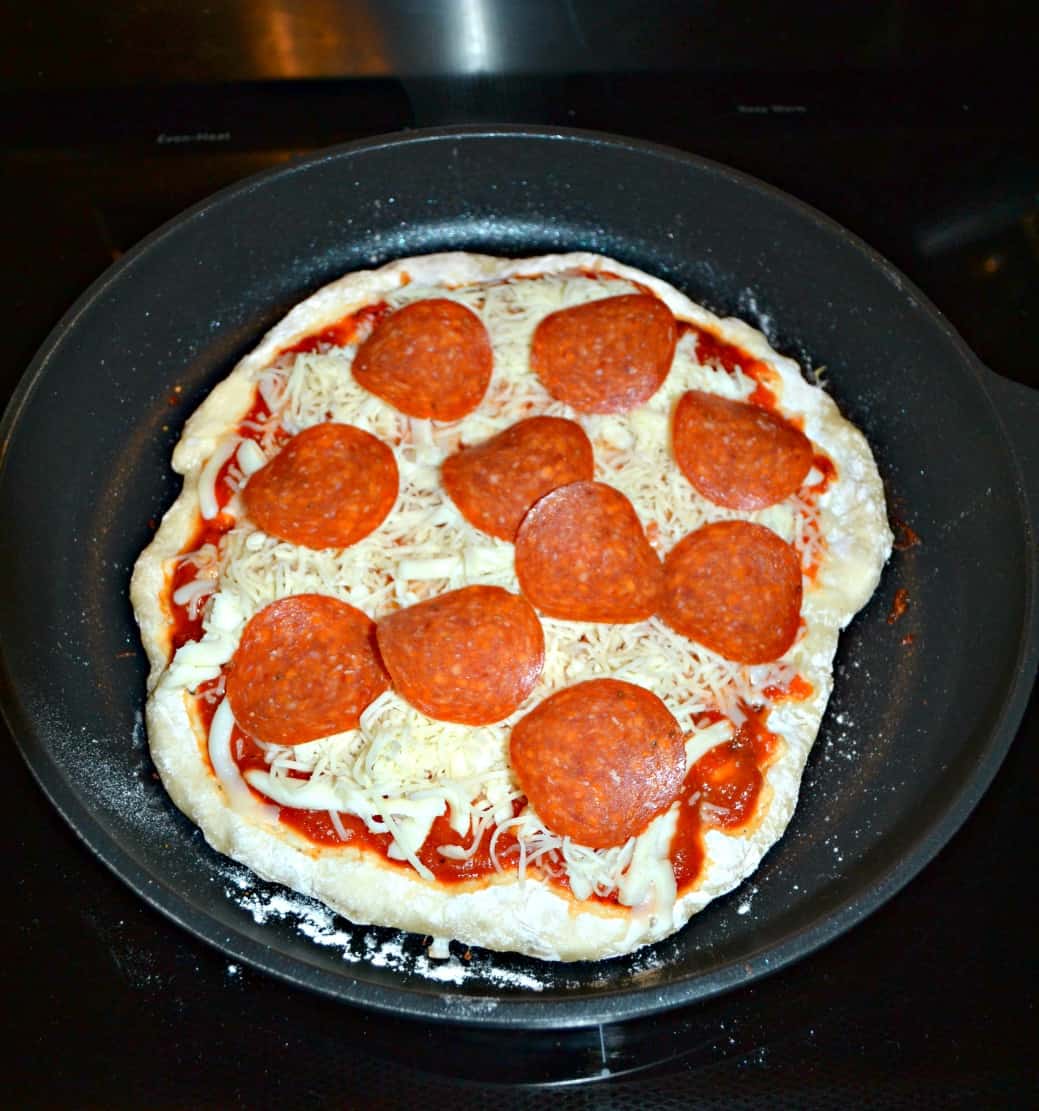
Then you preheat a skillet and place the dough in the hot skillet and cook until the bottom gets brown. Quickly put on the toppings and put it under the broiler until the cheese is melted and the toppings are cooked.
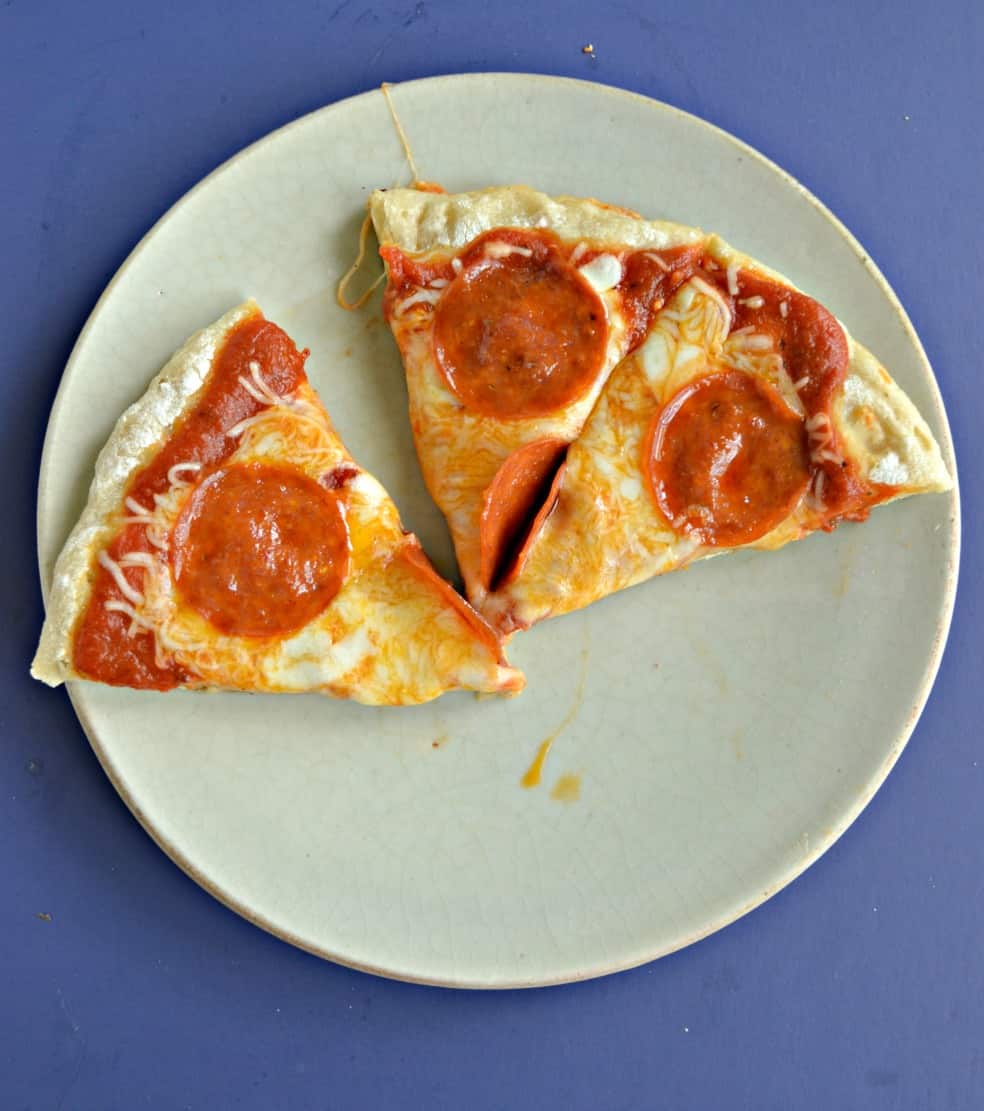
I thought this pizza was awesome. The bottom was crisp and the cheese was gooey. The crust had a big of tang to it from the sourdough. It was amazing! I’ve made it several times since the first time and it’s quickly becoming one of my favorites!
Check out these other great pizza recipes:
- Air Fryer Buffalo Chicken Flatbread Pizza
- Beach Ball Fruit Pizza
- Breakfast Pizza
- Pizza Grilled Cheese
Sourdough Pizza
Ingredients
- 1/2 c. sourdough starter discard
- 2 teaspoons salt
- 2 Tablespoons olive oil
- 1/2 c. whole wheat flour
- 3 1/2 c. all purpose flour
- 1-1 1/2 c. water
- Pizza toppings
Instructions
- The night before you are making the pizzas combine the sourdough starter, salt, olive oil, whole wheat flour, all purpose flour, and 1 cup of water.
- Mix well. If needed, add a little water at a time until the dough comes together. Do not add too much water.
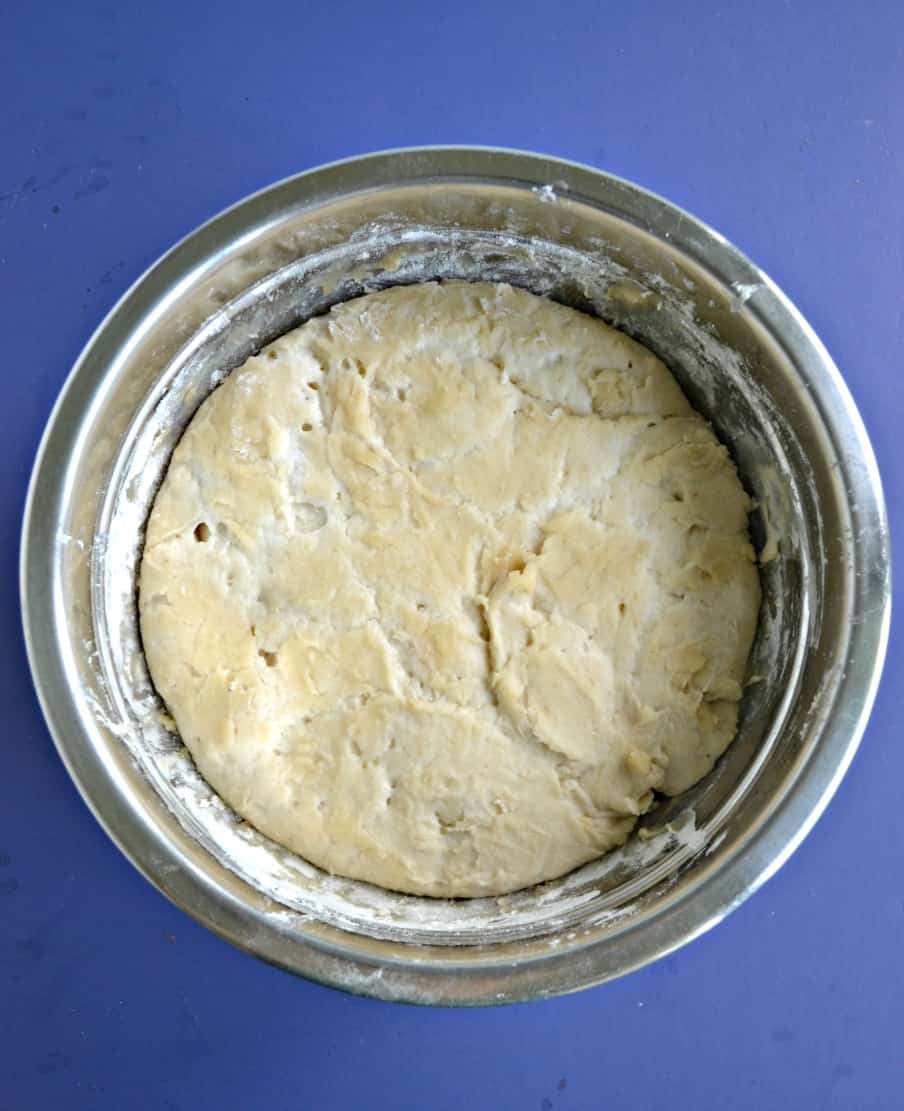
- Cover the bowl and allow the dough to rising at room temperature overnight.
- In the morning uncover the bowl and perform a set of sstretch and folds. This is where you pull the dough from one side and pull it to the other side. Turn the bowl 90 degrees and repeat. Do this for all 4 sides. You may need to wet your hands to prevent sticking.
- Cover the bowl and place it in the refrigerator up to 36 hours. You can also go on to make the pizzas without putting the dough in the refrigerator.
- Remove the dough from the refrigerator and let rest for 30 minutes. If you skipped putting it in the refridgerator you don't have to let the dough rest before using.
- Divide the dough into 4 equal pieces and place on a well floured work areas. Shape each portion into a ball. Cover the mounds with a towel and let rest 30 minutes.
- Turn on the broiler of your oven.
- Heat a cast iron skillet over medium high heat.
- Press each ball of dough into an 8 inch circle on a floured surface. You may need to use a lot of flour to prevent it from sticking. That's fine!
- Once the skillet it hot lay one of the dough circles in the skillet. Cook for 2-3 minutes. Place the pizza sauce and toppings on the crust in the skillet and cook for an additional 3 minutes or until the bottom is starting to char.
- Transfer the cast irom skillet to the oven under the broiler and bake for 2-4 minutes. I actually transferred the pizzas to a large baking sheet because I wanted to make several at the same time and I put them all under the broiler at the same time so they were finished at the same time. You can do it either way.
Notes

Perfect Pizza Pie!
- Caramelized Peaches and Prosciutto Pizza by Making Miracles
- Cast Iron Skillet Pizza by That Recipe
- Easy Crust Tomato Pizza by Karen’s Kitchen Stories
- Mini Pizza Bites by Palatable Pastime
- Roasted Garlic and Chicken White Pizza by Family Around the Table
- Sourdough Pizza Crust by Hezzi-D’s Books and Cooks
- Southwestern Tortilla Pizza by The Freshman Cook
- White Seafood Pizza by Art of Natural Living
We share Recipes From Our Dinner Table! Join our group and share your recipes, too! While you’re at it, join our Pinterest board, too!
If I had realized how great sourdough discard recipes were I’d have gotten starter years earlier! Happy to have another great idea!
Love this way to use sourdough. Individual pizzas are great in my house in case my “yucky” toppings give their half of the pizza cooties… haha!
I love that you can make individual pizzas in the skillet! That way, you can vary the toppings too.
This looks like a completely delicious way to use up some of your sourdough discard! And I love that you can freeze some for later if you don’t need it all at one time, these look so tasty!
I love sourdough pizza crust. A great way to use your discard.